5 Ways to enjoy apples this fall!

IMG_6993

I know, I know, kind of late on getting the ball rolling this fall. Teething, working and a busy-body toddler got first in line for the last couple months! Finally here we are, Apple season is just at the end, but hopefully you will still be able to enjoy some of these festive fall treats and recipes when the colder days roll in!

You may also enjoy 10 Great Gifts for the Mother who does it all!

Apples are one of my favourite fruit, and I know for a fact that it is my husbands favourite fruit, so with that being said, fall always fills our house with these wonderful multi-used fruits! I love the sweeter apples, like Granny Smith, yum! My husband loves the Honey Crisp apples, which are also delicious I must admit, and Ez, well she just loves to have a whole apple in her hand to munch and crunch!

As I started to embark on which pastries and activities I would be putting together for our family this fall, I thought I’d share the love and let you all in on our secret home recipes for a few of our favourites! Enjoy!


APPLE PICKING – TAVES FAMILY FARM

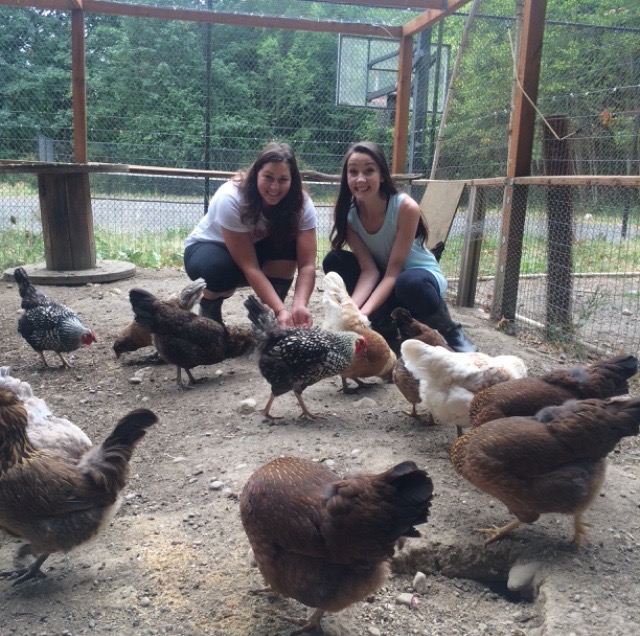
Now to start off apple season, you’ve got to go collect them! This year is super exciting for us because our little miss is walking and almost running, I’ve been waiting for a few months now to go apple picking with her. Just like her dad, she LOVES apples, so going to Taves Family Farm, she was on cloud 9 and could barely contain herself.

She was running up and down the rows of ‘Papple’ trees, picking up all the (gross) apples and trying to take a bite. We had her up on our shoulders, picking the ones at the tippy top and walking alongside the trees, reaching some of her very own. (and then when she would go to pull them off, she would yell at us, “TUCK mama, papple TUCK!”)

Ezra’s outfit : Fox Knit Hat : Home Grown Knot Co. / Cranberry Bow : Little Olive Designs/ Mustard Dress : Jax & Lennon


IMG_5128

APPLE PIE – Homemade is the Best-made

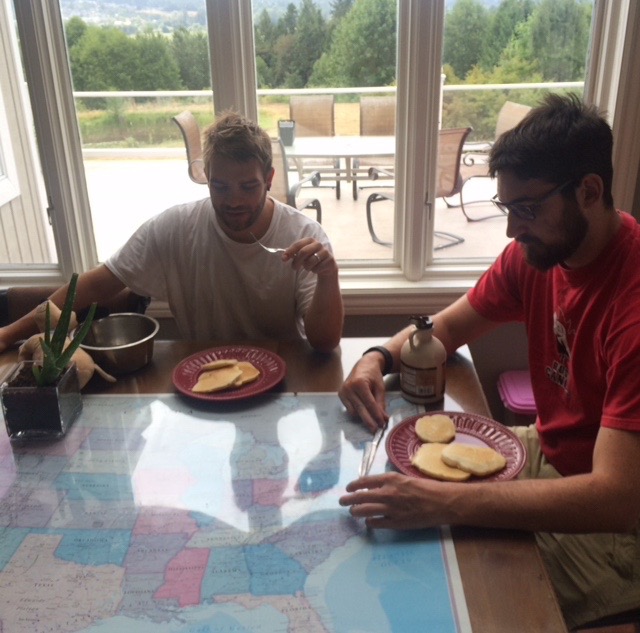
Lets just start this portion of this entry by saying, I am very blessed to have a husband who supports, and eats, everything I do and bake. Lol

The first thing you’ll want to do is make a fresh batch (or two if you’d like to criss cross the top) of some homemade pie crust! Check out the full recipe for 1-2-3-ROLL! Your easiest pie crust yet! for my favourite starter.

The classic homemade Apple Pie. Today I am going to share with you how to make this Holiday Staple. To start, I would suggest definitely picking up some hard, tart apples, Granny Smith or maybe Honey Crisp are great! The best part about this recipe is that there are only 7 steps and you will only need TEN ingredients, and most of these are already sitting on your shelves!

Head on over to [1-2-3-ROLL, your easiest pie crust yet] to find step by step instructions and everything you will need to make this homemade classic!

I wish, I wish, I wish I had a food processor. you’ll see why when you look into the pie crust making above lol! But low and behold I had my trusty pastry blender to bring it all home at the end of the day. One thing to look out for when you are choosing your apples is how juicy they are. Unfortunately when I was making my pie, I overlooked this part and my pie ended up coming out a little more juicy this time. Nothing that a few extra minutes in the over couldn’t help though!

Head on over to Homemade Apple Pie FULL RECIPE to find out what you’ll need to bake your very own Apple Pie. (Make sure you scroll all the way to the bottom for an extra little treat!)


IMG_7150

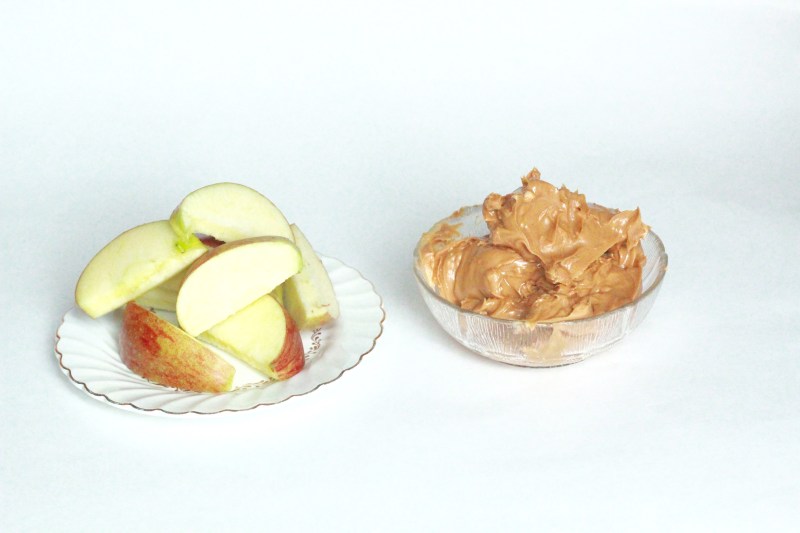
PB & Apples : A classic and a staple in this household!

Honestly, one of my go-to snacks from since I can remember, is just cut up apple and peanut butter. Here’s a picture? But I’m sure you know what it looks like lol!

You may also enjoy : The Best Butter Chicken Sauce


IMG_4577

Apple Cider

I cannot believe how YUMMY this was! Now this was the one that intimidated me. When I first set out to put this post together of my favourites for the fall, one staple for me is apple cider, and yes, the powdered ones. This time though, I wanted to try and actually MAKE the cider. So here we are!

I cannot believe how delicious this cider was. I am embarrased to admit this, but I am quite the snob when it comes to apple and orange juices. I love the raw, pulpy, hand squeezed taste. My absolute favourites are ‘Simply Brand – Apple Juice’ and ‘Tropicana , Some pulp, Orange Juice” LOL! If you love cider as much as I do well then this will be a treat! Here you can find the full recipe to Apple Cider Sippin, Enjoy!

IMG_4414


I ended up storing mine in one of our growlers we had and it worked out so well!

You may also like : Canadiana Styled Shoot


IMG_7142

Apple Chips

When I was growing up, my parents had an awesome food dehydrator (now being an adult and mother myself, I am extremely envious of this and wish I had one!). When I was thinking of making my own apple chips for my daughter, I was kind of bummed because I didn’t think I would be able to make them without a machine. I then stumbled across a couple recipes that only called for a pan, knife, apples and 200 degrees for 3 hours.

HELLO simple and HELLO delicious! I was quite hesitant and unsure that these little slices would turn out, but low and behold, 3 hours passed and there they were, delicious, crispy and full of crunch!

I am still in awe of how easy and delicious these were! Highly recommend these delicious chips. The only part that was a bit daunting was slicing the apples, but if you’ve got a super sharp knife, or better yet, a mandolin then you’ll be fine!

Here’s what you’ll need:

  • 3 apples (larger size and either granny smith or honey crisp)
  • sharp knife
  • 2 baking sheets
  • parchment paper

IMG_7080

Start by slicing your apples into very thin slices and placing on the baking sheet. The parchment paper will make it easier to flip your apples when you are halfway through baking. I overlapped my apples and it turned out okay, so don’t be afraid to get more on your baking sheet.

Preheat your oven to 200 degrees. When the oven is ready, place your baking sheet in for 1 hour, remove and flip apples to other side and cook again for 1-1.5 hours. I found that mine were still a bit ‘soggy’ when I took them out after 2 hours so I kept them in and checked every 15 minutes to make sure they weren’t burning. 3 hours was perfect for my oven!

ENJOY!


During this whole process there was a few times that I had to put Ez in her high chair and try and make do with what we had around the house, some of this included using the wooden spoons I was baking with to whack her tray with, paw patrol, eating an entire apple and the saviour of them all, a wagon wheel. This kid will pick off every last bit of the CHOCOLATE and then eat the marsh mellow! Who’s kid is this?!?! 

After the first few items on this list, not that this is some grand realization, but I can confirm that apples are amazing. You can pick them, bake them, juice them, jar them, dry them and the list goes on.

Tried any of these recipes out? I would LOVE to see how you did and your spin on these Holiday Classics! Please tag me on your instagram @stumbling grace, Stumbling Grace Blog on facebook or sending me a message on here! Good luck and have fun ❤

XOX Cass


Homemade Apple Pie – Recipe

The classic homemade Apple Pie. Today I am going to share with you how to make this Holiday Staple. Start off by picking up some hard, tart apples, Granny Smith or maybe Honey Crisp are great! The best part about this recipe is that there are only 7 steps and you will only need TEN ingredients, and most of these are already sitting on your shelves!

You may also enjoy : The Best Butter Chicken

Ingredients:

  • 2 batches of my one minute homemade pie crust (or 1 if you roll it out very thinly!)
  • 7-8 small granny smith apples, peeled, sliced, and cored
  • 1 stick butter
  • 3 tbsp all-purpose flour
  • 1/4 cup water
  • 1/2 cup white sugar
  • 1/2 cup brown sugar
  • 1 heaping tsp cinnamon
  • 1/4 tsp nutmeg
  • 1 tsp vanilla

1). Place the peeled, cored, and sliced apples in a large bowl. Set aside.

2). Preheat oven to 425F.

3). In a medium saucepan, melt butter over medium heat. Add the 3 tbsp of flour and mix well, forming a paste. Add the water, sugars, cinnamon, nutmeg, and vanilla and mix well. Bring to a boil for 1 minute, then reduce heat to a simmer for an additional minute.

4). Remove from heat and reserve about 1/3 cup of filling for pie crust. Add remaining filling to apples. Toss well.

5). Pour apples into prepared pie crust, mounding slightly. Top with second pie crust (lattice design, etc). Brush the remaining 1/3 cup caramel filling over the crust.

You may also enjoy : Keepin’ comfy no matter what hat I’m wearing

6). Cover the pie loosely with aluminum foil. I lightly spray the foil so it does not stick to the pie. Place the pie on top of a cookie sheet (to catch any drips) and bake at 425F for 10-12 minutes. Reduce the heat to 350F and bake for another 50 minutes (remove the foil the last 10 minutes to let the crust brown), or until done.  The pie is done when the crust is golden-brown and the apples are soft when pierced with a fork.

7). Allow the pie to cool before serving. Enjoy!

Serves: 8-10 people.

Recipe adapted from: http://allrecipes.com/Recipe/Apple-Pie-by-Grandma-Ople/. 

Adapted recipe courtesy of Audrey’s Apron.

Mini Pie Bites (or deceiving sausage rolls)

After I had put the filling in to the pie crust and noticed that I had some left overs of the filling and the dough. I quickly cut up another apple and made little triangles of dough to wrap with filling for small like apple bites. It was a complete on the whim experiment but it worked out! I put them on a small pan beside the pie and let them cook about the same time as the pie – checking on them every 20 minutes or so though!

Enjoy!!

I would LOVE to hear your favorite fall time recipes and if you have ever experimented with your very own apple pies! or better yet, created apple bites yourself lol!

XOX Cass


1-2-3 – Roll! Your easiest pie crust yet!

Homemade Pie Crust? WHO has time for that?! Why you do of corse. With this simple recipe, you’ll be making this pie crust in your sleep, especially after you bite in to it! When I first started thinking about making my first pie a few years back I assumed I would just pick up a ready made pie crust from the grocery store. Nope. Apparently I married in to a connoisseur of all things baked/cooked from scratch.

You may also enjoy : Top ten gifts for the mom who does it all

To get started here, always remember to wash your hands and take off your rings! Does any one else have a small trinket dish that they use when baking/washing hands/doing chores that they use to keep their treasures? Below you will see my place of choice. It is called the ‘Trinket Dish” from Three Corners Artisan.

Trinket Dish - Three Corners Artisan

You can find the Trinket Dish HERE.

Having a husband who avidly searches to cook new things is definitely not a problem for me! My husband is constantly showing and teaching me new ways to cook things, how to tell if something is done (or overdone, whoops!) and that sometimes it really is easier to just make it from scratch! Hence, this simple 3 step pie crust recipe. Don’t be intimidated! If I can do this, you can do this!

You may also enjoy : The Best Butter Chicken Sauce

4 Step Homemade Pie Crust

Ingredients:

  • 1-3/4 cup all-purpose flour
  • 1 teaspoon sugar
  • 1-1/2 sticks butter (12 tablespoons), cut into slices
  • 1/4 cup + 2 tbsp ice water

1) Mix flour and sugar in bowl.

2) Add about half of the butter.  Add the rest of the butter. Blend until the mixture turns into coarse crumbs (small pea size).

3) Slowly add the ice water and pulse until the dough gathers up into a ball.  If it doesn’t after a few seconds, add a few more drops of ice water until it does.

4) Take the dough and flatten it into a disc and place it on a sheet of floured plastic wrap. Refrigerate for about 30 minutes before rolling. Remember to use the plastic wrap trick from below!

If you’ve got any tricks up your sleeves on how to make pie crust, different designs or just want to share your experience with this recipe, let me know below in the comments! I would love to hear from you, and get new ideas! 

Happy Baking!

XOX – Cass

(Check out my 3 extra tips below to easier pie dough making!)

Pie Crust 101

3 Tips to the easiest pie crust!

Tip #1 : One thing that I did see online, that I did not have but would love to try one day, is someone suggested using a food processor to mix and blend the butter into your flour mixture. I took the rustic path of the pastry blender. 

You may also like : Canadiana Styled Shoot

Tip #2 : When rolling out the dough to get it ready for the pan, place a piece of saran wrap overtop and underneath of the dough before pressing the rolling pin down. This will make your life, and washing time, so much easier! The dough will not stick to the rolling pin and will be a nice quick wrap up and toss when done.

Tip #3 : Once you have refrigerated and rolled out your pie crust, you can decide how you would like to form it. I always love the classic look of pinched edges and a lattice crust, but you can be creative! Remember, rustic is okay here: you want your pie to look homemade!


LEGO of your DIY fears!

Here are 3 DIY’s that will make sure, EVERYTHING IS AWESOME, at your Lego party!

IMG_6587

A few weeks back, I had the privilege of working along side Chalie from Gold’n’Grasses for a very special birthday party for her son. Being an avid lego collector and enthusiast, he wanted to have nothing more than a party that was completely ENGULFED in the LEGO world!

Now, having a small flash back to when I was a child, my brother, sister and I loved and adored all things Lego, we would want nothing more, for any occasion, than to sit and build, create and imagine for hours on end. When I was first approached for this project,  my 6-year-old-Cassandra-heart was jumping for joy and waiting in anticipation for the day this party would come! Just listening to Chalie talk about all she had planned made my heart pitter patter, dreaming alongside her and envisioning what she was about to achieve! And boy, oh boy did his mama deliver!

Continue reading on for FREE printable’s, created by yours truly, and more DIY projects to make your very own LEGO party for your little (or grown up) super fan. I absolutely LOVED being apart of this event with Chalie and being able to help bring her vision to life. I am always looking to collaborate for my next event, whether it be creating or partnering with creators, so don’t be shy! Let’s Chat.

DIY #1 – Lego Building Activity Cards (FREE Printable)

You may also like 40’s Lemonade Stand

Get some creativity going and start the spark of imagination with these fun and customizable Lego Activity Cards. These cards were super simple to make and to create a set that was completely unique to Tristan! (ex: Create a number 5 out of Lego, Create a letter ‘T’ out of Lego, etc.) You can move on to creating favourite things of the birthday girl or boy or even just another item that falls into the theme of the party, ex: Police Station. Enjoy!

Below is a link to your very own set of Lego Activity Cards to use at your next party or even just around the house!! I would love to hear what you come up with for your own set that is unique and customized for your little ones! 

[Click here for LEGO Activity Cards]

___________________________________________________________

DIY #2 City Line Photo Booth Backdrop

This DIY was a 3-part task, now I chose to paint the pieces after I had measured and cut them. I also decided to use spray paint so that made it a lot easier as well! Here is a rough break down of how I made these beautiful, simple but dramatic party decor come to life!

Step 1 : Materials

Find what you are going to use as your base for this project. My hubs went to Costco and grabbed a couple of the pieces of cardboard that sit in-between the giant pallets and brought them home to cut up!  (I used 3 pieces of 3ft x 5ft) You can also use cardboard boxes, diaper boxes, or even head over to Michaels or Staples and pick up black poster board.

Step 2: Trace/Sketch

Sketch out the exact shapes that you would like to cut out – here it is not really a big deal if you mess up or have pencil everywhere. You are going to be painting over it soon, but if you are really unsure, take a sharpie or marker and trace the exact lines so you dont make a mistake while cutting!

Step 3: Cutting

This was the most grueling task for this whole project. I used a cutting board underneath while I used my exacto knife and then later on realized that using scissors would be much easier. Just make sure it’s not the cheap-o version!

IMG_4737

Step 4: Painting

The paint I found the easiest and quickest to use was spray paint, I placed a large piece of plastic on the ground and did 2 coats of black matte spray paint. You could totally do this with a paint brush, I just imagine it taking 5 times longer!

Step 5: Dry & Set up!

IMG_4752

___________________________________________________________

DIY #3 Gift Bag Tags (FREE Printable)

Don’t forget to tag the bag and to say thanks for celebrating the girl/boy of the hour! I designed these awesome tags for Chalie & Tristan to attach to their iconic ‘Money Bag’ goody bags. What an awesome idea, because, well, a bag full of money is a pretty awesome goodie! lol. Follow a long and grab your very own gift tags to use for your next Lego party!

Below is a link to your FREE PRINTABLE for your own gift tags the next time you throw a Lego Party!

[Click here for Lego Favor Bag Tags]

Even MORE Lego DIY’s to keep the party going! 

Lego Twister – Created & Crafted by Chalie at GOLDNgrasses
Diamond Pinata – Created & Crafted by Chalie at GOLDNgrasses

If you haven’t had a chance yet, head on over to Gold’n’Grasses and get the FULL layout and run down here of all the shops involved, other DIY’s you won’t want to miss and photos of her big 5 year old boy!! It was such an enormous joy to not only celebrate Tristan in turning 5, but to work alongside someone who is just as passionate and goal driven to see their dream come to fruition. Chalie my girl, you are a true Gem! And not just because you made an awesome Diamond Pinata! ❤

Happy Birthday Tristan, I hope it was a blast and that EVERYTHING WAS AWESOME!!

Xo Cass

You may also enjoy Ezra’s first Flamingo

If there was anything that Chalie had or used in this party and are worried about finding out where she found the perfect pieces for this Lego theme, look no further! Below are all the links you will need to find the local and creative community that poured in to this event.

Styled & Curated by : Chalie at GoldnGrasses

Photographer  :  Creative Wife & Joyful Worker

​Photo editing: GOLDNgrasses

Venue :  High Street Community Room
Food :  Memphis Blues BBQ
Custom cake & macarons :   Super Sweet Sheep
​Mini mango cheesecakes & white chocolate ganache pudding: The Wooden Whisk
Night out sprinkle mix : Dainty Sprinkle co.
Sugar cookies : Sweeter with a Cookie
Popsicles : Tubify
Cake toppers : Glitter Paper Scissors
Lego printables : Swirl Creative
​Lego head printables : Creative Wife and Joyful Worker (link coming soon)
​Lego activity cards & cityscape & gift tags : Stumbling Grace
Art school speckle large plate & tissue diamonds: Bash Party Goods
Canapé grid plate paper ware :  Heather & Gem
Paper straws & candles :Joonie and Joe
Cups & napkins :EZ party
​Confetti & small ballons : Oh Happy Day! Party Shop
Customized wooden pendant banner :Sprig West
Lego cutlery & party favors : Oriental trading
High five shirt :Lucky Bum Clothing
​Kids tables and chairs :Turkey Party Makers Ltd.
Lego twister DIY : GOLDNgrasses
Diamond piñata DIY : GOLDNgrasses
Lego cop printable : GOLDNgrasses


Van2San Roadtrip 2015 [Pt.1]

Earlier in the year Mackenzie and I signed up and joined a group from Gracepoint Community Church, to travel to Mexico with One Life One Chance Ministries. We started to plan out our trip, what we would bring, where we were going and how we would get there. The entire team itself was flying down to San Diego and then driving in to Mexico. Mackenzie and I were talking about the trip with some friends one night after a dinner date and we ended up planning an entire road trip with them that centered around Mexico with a road trip on either end of it!


Highlight’s of Van2San Roadtrip 2016
  • Catching a chicken
  • Notebook doodles – pictures
  • Tilamook Cheese Factory + ice cream
  • The Oregon Coast
  • DIY memory cup
  • Devil’s Punch Bowl
  • Oceanside Murals
  • Redwood Forest
  • An engagement

The group of us definitely made the most of this trip and mapped it out accordingly. I am so thankful for Chelsea’s organization skills; our trip, budget and accommodations were all flawless! We started off planning by thinking about the coast, what hot spots we would like to hit and which ones were actually doable, while sticking to a backpackers budget. After all this was decided, we got together,  compared lists and mapped out the route, planning campgrounds, mealtimes and tourist stops.

We were SO grateful to my friend Melissa for opening up her family’s home in Woodenville, Washington for our first night of rest while on the road. When we arrived we were welcomed with open arms, enjoyed some time in their pool and in the morning, walked right out to the chicken coop and grabbed some fresh eggs for breakfast! What a DREAM.

IMG_1013IMG_0981IMG_0988IMG_1015IMG_1016IMG_1022

IMG_1021

Side project I started at the first starbucks we stopped across the border. I kept all my trinkets I found along the way in here!

We were soon on our way  to the coast, stopping in Washington one more time at a park on the side of the Columbia River, it was so beautiful! Overlooking the Columbia River and Astoria just within arms reach.

IMG_5742DSC_9428DSC_9401DSC_9418

DSC_9438

Finally we made it to Cannon Beach! The long awaited and much anticipated beauty. We set up camp at Wright’s for Camping Campground, grabbed a mug of hot cocoa and headed straight for the beach! After constantly looking up Cannon beach on the internet, hearing friends talk about it and watching the rolling, endless waves out the window, I was here! The way people describe it and cameras capture it truly does not do it justice. My toes were in the sand, the wind was in my hair and I didn’t have a care in the world. What a moment of pure bliss.

DSC_9527IMG_5795DSC_9513

IMG_1106

Keep your eyes peeled for more little doodles of add-ons throughout the trip! There’s quite the collection!

You may also like : Beach Ready From Head to ToteIMG_1029

It also did not disappoint that Ryan is very handy with a camera and took these absolutely breathtaking photos of Kenz and I on the beach!

DSC_9484DSC_9480DSC_9479DSC_9506

Our next stop on the map was the Tilamook Cheese Factory, as per Chelsea’s dream and request, but also to our enjoyment. There was so many different styles, smells and variations of cheese here, I didn’t even know this place existed, but thanks to Chels we got to enjoy cheese, ice cream and even some jerky! (One of these pictures you’ll see the first time ‘Operation Donut’ photographed)

DSC_9644IMG_1137DSC_9645IMG_1141

DSC_9637

WAIT FOR IT…..

DSC_9638

….where’s Ryan?

IMG_5887IMG_1145

IMG_1147

OPERATION DONUT

IMG_1129

Tilamook Country Smoker – The boys dream – After venturing through the cheese factory we started to walk towards to car and then we hear, “JERRKKKY” There was a factory beside the Tilamook Cheese Factory called the Tilamook Country Smoker. It was thoroughly enjoyed.

IMG_1134

Devil’s Punch Bowl is part of a state part just outside Otter Rock, Oregon. This view was breathtaking. I had read about this spot before our trip and it once was two separate caves that gave way and became one. It is centered on a large bowl naturally carved in a rock headland which is partially open to the Pacific Ocean. Waves enter the bowl and often violently churn, swirl, and foam. Definitely a site to see and something not to miss when you’re travelling through next time!

IMG_1171IMG_1158DSC_9681IMG_5985DSC_9703DSC_9717DSC_9730IMG_1346DSC_9759IMG_6187IMG_6170

IMG_6182

Port Orford

Welcome to California! We made it! We finally made it! Now off to find the Redwood Forest & Operation Donut – don’t worry it’s coming, you’ll soon find out! Now this forest specifically was another item to check off that I was excited to see and walk through. With trees reaching to the very tippy top of our atmosphere, it’s hard not to feel small, unless you’re hugging one of the infant trees. (Scroll up and check out Kenz and Chels huggin Redwood’s) We ventured on into the forest, looking up, feeling small and hugging every tree in our path.

IMG_1175IMG_6246IMG_1251IMG_1374IMG_1366IMG_6260

DSC_0006

“LOOK! I’m hugging a Redwood” – Chels *Kenz follows along*

DSC_0157


Then there it was, behold, the tree of love. (or as Mackenzie and I knew it; The big ‘O’) time for operation donut to commence. I can’t quite recall who started it but one of the two mentioned climbing up into the tree and taking a picture in it, and Ryan being the gentle-tall-man that he is, offered his hand in marria-err – assitstance to Chelsea. As she was getting settled on her perch, she turned to help Ryan and there he was. Waiting eagerly for her response, Operation Donut was in full bloom, “Will you marry me?” With tear filled eyes, Chelsea says,”GET UP HERE!!”

Now that was intense! Mackenzie and I were set up at different angles to capture the moment for them and there couldn’t have been a better set up because we were already walking through the forest and taking pictures of everything we saw. So climbing up in a big tree was a no-brainer! Excited for these two and their journey together. They are actually to be wed THIS Saturday, we cannot wait to celebrate with them!

DSC_0017DSC_0030DSC_0062IMG_1397IMG_1401

Redwood Forest Campground is where we camped overnight, this is where we enjoyed several card games and left our mark in the table along with many other visitors throughout the years. #VAN2SAN2015

IMG_1445IMG_1412IMG_1414IMG_1418

DSC_0077

Celebrating their engagement with Party Poppers!

IMG_1437DSC_0115DSC_0111

Paul Bunyan & Babe

TRIP CONTINUED ON TO NEXT POST >>> Van2San Roadtrip 2015 [Pt.2]

40’s Lemonade Stand – Styled Shoot


A few months ago, myself and Natalia, The Venture Creative, were having a goals and inspiration girls night and came up for the vision for this shoot. We started to prep and plan different styled shoots, ideas for promotional materials, products we would like to review and companies that made our hearts jump and skip a beat! And thus, the ’40’s Lemonade Stand’ was born.

40’s Lemonade Stand Highlights:

  • Mason Jar/Lemon Sugar Cookies
  • Local Shops & Products
  • 14 Lemons
  • DIY Lemonade Stand
  • Ethical Visions & Support
  • Sweet&Sour faces
  • First Date – Sharing a Sippycup
  • 40’s Themed Outfits


Now my first concern here was, where and how and when am I going to make a Lemonade Stand, and from what? Do I go the route of a large wooden pallet, two wooden crates, or buy one.

**Enter Superhero-Handyman-Hubby**

I explain my thought process to Kenz and the different ways I could go about making the Lemonade Stand and his response, “I’ll just make one!” I think I just fell in love all over again. He took a bunch of left over wood we had from taking apart a bunk bed a few months back, (he also used this for the backdrop at Ezra’s First Flamingo – check it out), and went to work! I could not believe how perfect and beautiful it is! *insert happy cry* While he was building it, he had the face of it complete and I was thrilled! He then told me he had a lot more to do because he wanted it to be sturdy for Ezra and her cousins to play with for a long time to come. He added extra supports, squared it off and made sure everything was tight and secure. What a great man he is, always bringing my dreams to life! I will be making a separate post for your very own DIY Lemonade Stand in the near future so keep your eyes peeled!

We had so much fun with this shoot, involving all three of our children was difficult but so much fun! Luckily we had both of our husbands there to help rangle the kids and make them smile. We really lucked out with the weather that day, the entire week before and after had been in the high 20’s and this day just happened to be overcast. The perfect day for a summer shoot out in the sun.

You may also like : Donut Grow Up – Styled Shoot

When I first started searching for who I wanted to involve in this project, there was a couple that came to mind right away and a few that I stumbled upon and am absolutely in LOVE with. Seriously, after you’ve looked through all the beautiful photos by Natalia Reardon Photography, scroll down to all the amazing LOCAL shops involved.

Through planning and executing this vision of the Lemonade Stand, I got to meet some of the makers behind the scenes. I had Kara from Nest&co Handcrafted over for a cup of tea when she brought over the adorable romper photographed above. I think this may be one of my favourite parts of organizing these style shoots is meeting and learning about the shops, how they came to fruition and the passion that keeps them going.

You may also like : Canadiana – Styled Shoot

Planning, Prepping and Preparing. 40’s theme, think bonnets, knee high socks and pearls. PEARLS! I remembered I had seen the most adorable mommy and me sets from Baby Bear Design just the other day, I rushed over and behold, there they were, perfect for the girls. Amy has a serious amount of awesome chewellery, teethers, children’s & adult apparel and she has big things coming down the shoot, check her and BabyBearDesign out here!

THE Bonnet. I originally was introduced to Fawn & Lace through Tara Teng, she posted a photo of her little girl in one of her bonnets and I was instantly in love! I contacted Parla and explained the vision behind the 40’s Lemonade Stand and if she would be interested in being involved. Now HERE is the real reason I wanted her beautiful bonnet to be featured in our shoot, to raise awareness and to promote what she is doing behind the scenes. Not only are her bonnets made from recycled materials but for each bonnet that is purchased, she puts $5 of your purchase towards women at risk and survivors of trafficking. Whaaaat? If you can’t already tell, this woman has such a huge heart and is doing amazing things. Go check out her handmade bonnets now and help support not only locally made and sourced items, but for women who need all the help they can get.

Here’s where you can pick up yours, but be quick! They’re only put out in limited releases. Her next release date will be at the end of July.

I got to meet another amazing shop owner along the way, Kim, grandma to Mia and one of the makers behind Mia’s Mocs. They’re goal and driving force is to provide great quality moccasins at affordable prices for new moms, moms with large families, low income families, families with special needs children and military families. You know those moments that just kind of catch you off guard, that you’re not expecting but it is such a joyful surprise when it does? This happened when I ran up to the door to meet Kim, and we ended up chatting for about 20 minutes about her daughter, grand daughter, my little Ez and the goal of Mia’s Mocs. It’s such a joy to get to know the makers, a snippet of who they are and who you are supporting and promoting. So thank you Kim and Alyssia!

The beautiful banner of lemons hung on the Stand was made by Little Sprout Creations and in the midst of her own hustle and bustle of putting together her daughter’s 2nd birthday, her shops 1st Birthday AND a giveaway, she still put time aside to make sure these lemons made it to the shoot. What a gem Jen is, the passion she puts behind her product and customer service is unreal. Thank you Thank you!!

Arn’t these cookies beautiful? Well, if you we’re wondering, yes they tasted even better than they looked! How is that possible? I couldn’t have imagined these cookies looking any other way. DesignerCookies really outdid themselves for this delicious treat for our littles, even though I’m sure they ate way too many during the shoot! Designer Cookies is a cookies company that makes custom sugar cookies to order based in Metro Vancouver. You can order yours here.

Seeing a photoshoot, and very much a project, come together and to fruition filled me with so much joy and excitement for the ones to come. We’ve got some amazing stuff down the shoot and I can’t wait to share it all with you.

XOXO

Here’s a couple post-shoot shots of Ez… How could I resist?! Is there really anything cuter than a naked babe in a basket?


Contributors

Photographer : Natalia Reardon Photography

Lemonade Stand : Hubby DIY

Lemons & Mason Jar Cookies : Designer Cookies

Lemons Banner : Little Sprout Creations

Black Striped Paper Straws : Party City

Ezra’s Outfit

Lace Bonnet : Fawn and Lace

Yellow Floral Romper : Nest & Co. Handcrafted

Knee High Socks : Petite Littles

Pearl Necklace : Baby Bear Design

Grey Mocs : Mia’s Mocs

Kylan’s Outfit

Fedora : Joe Fresh

White Dress Shirt : Joe Fresh

Bow Tie : Little Beau Boutique

Suspenders : H&M

Khaki Shorts : Joe Fresh

Socks : Petite Littles

Brown Mocs : Mia’s Mocs 


Eliana’s Outfit

Sun Hat : Gap

Pearl Necklace : Baby Bear Design

Dress : Nest and Nurture


Tropic like It’s Hot, There’s A Birthday Giveaway!

A couple weeks ago Ez and I were invited to join in and celebrate the 1st Birthday Bash for Little Sprout Creations and oh boy, was it a blast! Jen and I met a couple months ago while I was working alongside her at the Local Love in Spring Market for Beluga Baby. We really hit it off and ever since have been almost inseparable! Both having a passion for creating, small children and eating.

The morning started with Jen heading over to my house and piling Ez and I into her GIANT truck. That in itself was an adventure. We headed over to the Jubilee Collection in Abbotsford for a few key pieces that Jen had rented for the day and then arrived at the shoot location; High Street.

When we arrived at the High Street we were both starving and in need of a caffeine boost, I ran over to Starbucks with Ez to grab the goods. I ordered a full breakfast for each of us and a small one for Ez, two coffees and an iced drink. I then lifted out my wallet to pay and the barista leaned closer to me and let me know my order had been paid for in full. There was a man sitting by the window, reading a book, sipping his coffee, and he had given the barista an bottomless gift card for customers order that morning. I couldn’t believe it! People, there is still true, honest, goodness in the world, even if it is in coffee form! Ezra and I grabbed our items to go, but we didn’t leave without saying thank you, Ezra flashed her 6 pearly whites and gave the man a small wave. What an amazing, unexpected, kind way to start the morning.

You may also like : Canadiana Styled Shoot

While prepping, I had the opportunity to gift Jen a mini makeover for the big birthday bash, for those of you who don’t know, one of my part time jobs is M/U for bridal and special events. We were just finishing up and then thought to ourselves, Sephora is right across the walk, endless lipsticks, balms and gloss, let’s go put on something fun! We rushed over, picked out our favorite shades of pink to match our tropical vibe and headed back to the shoot!

How perfect is it that the theme Jen had chosen to celebrate her shops one year of success was tropical! Ezra and I are now veterans of the tropical lifestyle and felt right at home in this flourishing, fruity climate!

You may also like Ezra’s First Flamingo

When I was trying to put together what I would wear, I was at a loss. The only tropical clothing item I had was a full blown, palm leaf dress and if I wore that, I would’ve blended in with the photo wall. I was digging away in my closet (sidenote: doesn’t it always seem like you have a million dresses that DON’T work when you’re looking for the one that does?) and then there it was, the dress I had hidden away for new years this year. It’s peach, kind of rose/blush, shiny, high-low style and perfect for a birthday bash! Ezra was easy-peasy, Jen had a couple shops come alongside her to celebrate that sent over clothing for each of the littles attending!

Ezra’s outfit details:

Hand made grey tunic from nest and co handmade

Suede and golden mocs from wildonesmocs

Flamingo headband from antlers and acorns.

We were finally ready to go! Despite the fact that when we got there Ez was rearing to go, getting in to everything, watching all the kids play as she sat immobile on the ground, then when the time came for the snack table to be photographed, guess who was asleep. You guessed correct; Ez. She had missed her morning nap and was getting cranky. I hugged her tight and snuggled her in to the Ezra Wrap and she fell fast asleep. But that didn’t stop this mama from getting’ her groove on!

Luckily there was still more fun to be had with the photo wall and extra treats! All these women had a blast with their babes. Thank you so much @littlesproutcreations for having us join in on the fun, it was an event to remember and has me thinking about Stumbling Grace’s birthday, but that won’t be until May next year! Make sure you scroll down for a list of all the shops who came out and helped make Jen’s vision come to life!

If you haven’t heard, Little Sprout Creations is having a HUGE giveaway for their first birthday. Head over here to enter in on the fun! There is some amazing stuff to be won.

Thanks for stopping by! Don’t forget to check out the vendors and guests below!

PS: Arn’t these two just adorable, I hear wedding bells ringing!

Shop & Decor info:

Type A Photography

– LSC Birthday Bash was beautifully captured by Type A Photography

http://typeaphotography.com/

Instagram @typeaphotography

email: typeaphotography@hotmail.com

Little Sprout Creations

– toppers (cake, cupcake, donuts), ferns on table & walls, wine glasses

www.facebook.com/littlesproutcreationsshop

Instagram @littlesproutcreations

littlesproutcreationsshop@gmail.com

Bloggers (& Models)

Deanna Reddy – Stylist – Style by Deanna

www.facebook.com/stylebydeannaco

Instagram @style.by.deanna

dmreddy@telus.net

Website: stylebydeanna.wordpress.com/

Samantha Lenz – “OH Samantha” Blog

Instagram @snlenz

samanthaNlenz@gmail.com

Website: www.samanthalenz.com 

Cassandra Fenton – “Stumbling Grace” Blog

Instagram @thecassra

cassandralfenton@gmail.com

Website: stumblinggracecom.wordpress.com/

—————————————————————————

Contributing Vendors

Panda Cakes

– toasted coconut cake, flamingo cupcakes, mini cupcakes

Instagram @panda_cakes__

panda_cakes@outlook.com

Cakes by Peddie

– macarons

Instagram @cakesbypeddie

alannahpeddie@gmail.com

Sugar Flour Bake Shoppe

– pineapple and flamingo cake pops

Instagram @sugarflourbakeshoppe

sugarflourbakeshoppe@gmail.com

Dainty Sprinkle Company

– sprinkles

Instagram @daintysprinkleco

daintysprinkleco@gmail.com

T’s (Once Upon a Tea Leaf)

– sangria tea mix

Instagram @onceuponatealeaf

teas@live.ca

Chalkboard Art by Emily

– “if you like pina coladas” chalkboard sign

Instagram @chalkdboardartbyemily

emily20cannon@gmail.com

Town & Country Vintage Home

– ceramic pineapples, throw pillow

Instagram @townandcountryvintagehome

townandcountryvintagehome@yahoo.ca

Little Rose Party Company

– giant white balloon with tassel, paper plates, painted cutlery, paper straws

Instagram @littlerosepartycompany

mshilton@live.ca

Sophia’s Flower Shop

– floral arrangements

Instagram @sophiasflowershop

sophiasflowershop@gmail.com

The Jubilee Collections

– picnic table & stumps

Instagram @thejubileecollection

thejubileecollection@outlook.com

Caribou Candle Company

– mini candles

Instagram @cariboucandleco

cariboucandleco@gmail.com

Mully’s

– table place cards

Instagram @mullys_handcrafted

karlybelanger@gmail.com

—————————————————————————

Baby Bear Design

– pineapple teethers, teething rattle, mom & baby necklaces, bracelets

Instagram @babybeardesign

babybeardesign@outlook.com

Emz + Co.

– “Snap That” hoodie

Instagram

emzandcokids@gmail.com

Antlers & Acorns

– flamingo headband

Instagram @antlersandacornsbc

antlersandacorns@hotmail.com

Wild One’s Mocs

– bow moccasins, hair clip

Instagram @wildonesmocs

wildonessales@gmail.com

Pacific Coast DIY

– “Aloha” sign

Instagram @pacificcoastdiy

pacificcoastdiy@hotmail.com

Nest & Co 

– Seafoam romper, lace trimmed grey dress, headbands

Instagram @nestandco_handcrafted

hello@nestandco.ca

Fog & Fern

– Fern shorties

@fog.and.fern

fogandfern@outlook.com

Ivy + Joy

– pineapple snapback hat

Instagram @ivyandjoy

Glass & Brass Vintage

– pendant necklaces, earrings

Instagram @glassandbrassvintage

glassandbrassvintage@gmail.com

Berry Pickin’ & Finger Lickin’

This past weekend we were intrigued to follow the crowd and head on over to the bounty and beauty of Krause Berry Farms. We started off the morning by gathering for brunch at Jen’s (@littlesproutcreations), which then turned into a small gathering; where there is food they will follow. With a delicious spread of fruit, oatmeal, bacon, eggs, pancakes and so much more, I’ll have to give Jen an A+ for hosting brunch!

After filling up on all the goodies, we started the ever-so-daunting hustle to get out the door and forty-five minutes later, we were on our way. Accompanied by Jen and her family we buckled down and braved the farm!

Kenz and ezbabybear designUPICK instructionsblue emiblue emi 2

When we arrived at Krause, there was a HUGE lineup for the annual butterfly release. This is a time where you can purchase a butterfly (to release) for $25 and proceeds go towards the Langley Hospice Society. 500+ guests call ahead of time to reserve their butterfly and release theirs in a time frame of 15 minutes, in to the farm and the garden area.

We stopped and wandered for a little bit to gaze at all the beautiful ‘Painted Lady’s’ and then headed for the Raspberry fields! We were told that the strawberries were completely over picked the prior weekend and that they were closed. But no worries here, Ezra, and Emi, would take raspberries over strawb’s any day!

row of plantseveryone in one shotsmiling pulling wagon

You may also like ‘Beach Ready from Head to Tote’

leaning overkenz and ez waterpickin berries me

Going through the countless rows of Raspberries, we were constantly watching the girls to make sure they were hydrated, shaded, and not eating all the berries. The tall Raspberry bushes made it easy to tuck the wagon to the side in the shade for a couple berries and some water.

jen and kids in wagonjen crouched with kidscass and ez berrie pickinez and basketcass picking beside wagon

E2 loved running up and down the rows of berries, well, really it was Emi running and Ez watching. We picked berries for about an hour and then headed in to walk through the market. I think our total for the berries we picked was close to $2.50. We didn’t bring home as much as I would’ve liked to but next year we’ll have to go a couple weeks prior and bring home a flat!

Emi basketEmi and JenEmi eating berriescass pickingbackpack shot

We could tell that the girls were getting tired and a little toasty from the sun, and given Ezra’s episode a few weeks back (see post here), we decided to head out, We made our way to Little Donkey in Fort Langley for some burritos! Ez has a fascination with beans and everybody loves burritos, and Jarritos, so this was the perfect fit! (That, and Trading Post was busy).

Ez and KenzEmi SassEmi2Emi close up Mocs

All in all this day of brunching, travelling, berry picking and Little Donkey’s was great and there needs to be more days like this. Next on the list is Blueberries in August!

Emi Jen and Alex

Emi’s Wearing

Floral Romper : Grammies Girls

Footwear: Flamingo – Minimoc

Ezra’s Wearing

Floral Romper: Little & Lively

Footwear: River – Minimoc

Teether : Baby Bear Designs

Mackenzie’s Hat : Nine O’clock Gun


BEACH READY – From Head to Tote.

Now that the sun is out in full bloom and is not showing any signs of going away (*happy dance*) I’ve gathered together my favorite pieces that are tried&true to enjoy the rays with and would love to share them with you! To start things off, here is my go-to, large-enough-to-carry-your-baby-in, spacious and beautiful, BeachBag.

HeadtoTote011


Beach Bag

H&M – It is always essential to have a generously large beach bag to keep all your essentials in one place. I found this one at H&M and am in love!

Sunscreen

K’Pure Naturals – Protect your skin! Make sure you’re lathering up with sun screen half an hour before you’re heading out in to the sun. K’Pure Naturals has recently changed the name of their miracle-screen, so when you’re looking to put it in your cart, make sure to search for ‘Beach Babe.’


this one

HeadtoTote015

HeadtoTote10

Lip Balm

EOS – When I spend a day in the sun, I find that your lips tend to dry out, even if I’m staying hydrated! So I make sure that I’ve always got lip balm on hand.

Sunglasses

Bluenotes – Usually when I am heading out on any roadtrip, day trip or beach day, I always bring my sunnies. Even in the thick of winter you can find me wearing a crown of shades lol! That white snow is bright! Check here for these heart shaped beauties. HeadtoTote08


West Coast Round Towel

Tofino Towel Co. – This beauty will be my summer go to for sure. The classic Tofino towel has a nice weight to it that it’s not going to flip over the second you walk on it, this is a BIG plus. The wide circular shape of their towels allows additional space for magazines, snacks and large sun hats but ALSO large enough to cuddle under the stars for those dreamy summer nights.

Wide-Brim Sunhat

Even though you are most likely already lathered up in sunscreen or tanning oils, a big hat is always a good idea. Whether it be to hide your crazy beach hair, cover your shoulders or provide shade for a snooze, go big or go home!

 HeadtoTote024HeadtoTote013

Water Bottle – Stay hydrated!

Free Reign Campaign – There are so many bottles out there that have different lids, textures and prints to fit anyone’s style. One of my favourites is this one from Melanie at Free Reign Campaign. The JOURNEY style bottle has a narrow top, therefore minimizing the amount of sand that may find its way in while at the beach.

Hand Sanitizer

Bed Bath & Bodyworks – Even though we swim and lounge in the river and sea, I find that when I come back to the towel for a snack I always give my hands a quick clean. Have you tried the relax-eucalyptuses line they have? Omigoodness!! Go now.

Snacks

Craisins & Granola Bars – Everyone can always use a little snack here and there, especially if you’re spending some time in the sun. Here are some ideas for quick snacks on the go that don’t need to be prepped or refrigerated; Craisins, Granola bars, fishies (yes, the little crackers), trail mix, apples, grapes, you get the idea!

HeadtoTote016HeadtoTote018HeadtoTote019

Trinket Pouch

Essence – I found this little treasure at Shoppers Drugmart- Make sure you’ve got a pouch that zips to place your jewelry, watch or phone in to make sure that they aren’t buried in the sand, misplaced or drenched in salt water!

Hair Ties

Plum Polka Dot – One of my most frustrating things about having long hair is the summer time sweat that it brings. Keep that hair off the back of your neck by tying it up with one of these adorable knotted ties from Plum Polka Dot.

HeadtoTote09_Fotor

Hair Care

Bumble & Bumble Hairdressers Invisible Oil Protective Primer – This is another thing I have recently made sure I have on hand, leave in conditioner ‘Hairdressers Invisible Oil Protective Primer’ or ‘Surf Spray’ from Bumble & Bumble. These have been my saving grace on crazy beach days that turn in to summer night BBQ’s. You spray it in your hair when its damp and let is air dry or you can add a little to dry hair get that texturized beach babe look.

Head phones / Wireless Adapter

Outdoor Tech/ Bose Speaker & Portable Charger – When I go to the beach, or at least used to go without child, I would spend some time basking in the sun, heating up and then plunging in to the water. I have recently discovered this AMAZing product from Outdoor Tech. It is a small device that makes anything wireless. Yup, you heard me, anything. You could go the route of wearing headphones and that’s cool, but you could also go the route of plugging in your OT piece to wireless speakers and having your phone tucked away safe from water and sand in your bag. Genius if you ask me.

Also – don’t forget that portable charger if you’re planning on doing an all day trip or your waterproof zip for electronics!

headphones


Notebook/Calendar

Chapters Indigo – Obviously something I love to do and am always thinking of is my blog. Jotting down ideas, inspirations and people I want to partner with on this journey! I go nowhere without it. I tend to find my most inspirational moments when I am out of the house, whether it be a walk in the park, laying on the beach, or coffee with friends (this last one if a big one, you guys inspire me so much!). If this isn’t your jam, no big deal, bring one of your favourite books along for a good read and some sun time.

Swim Suit

Nettles Tale – I cannot say enough good things and happy vibes about this company. This suit specifically carried me through the fourth trimester. When I was only a couple months postpartum this suit allowed me to still sun bath in July and have my little one close in a PeaPod up at camp. It is versatile, hugs and loves every body type, and is reversible. My favourite part about these suits is the bottoms though, their magic bottoms. Pulled those panels all the way up after just having Ez and it was like suddenly I was comfortable and confident to be in a bikini.

HeadtoTote024sandals

Flip Flops

American Eagle – I now have two pairs of flip flops from American Eagle and I am obsessed with them both! The pair I’ve chose for this haul are my beautiful nude flip flops. I just love how neutral and dainty they are. The other pair I have that I hardcore love are a criss-cross leather style (I have bought two of these pairs and will continue to do so lol). Come to think of it, I actually bought the nude flip flops when Payless was having a sale – great deals!

I hope you have found this post helpful and maybe even discovered some new items to add to your beach bag this summer! I would love to hear from YOU and what your never-leave-behind items are on beach days. This year with having a little one I don’t plan anything to go as expected and I’m okay with that. We’re summer ready and I’m excited about beach bums, sandy toes and summer nights.

Take care lovelies & enjoy the sun ❤

IMG_3332


Ezra’s First Flamingo

Flamingo Kisses

Olivia Ann Photography

Well, we did it! My little bean is one. How an entire year has gone by I don’t know, but at the same time I look back and remember all of these little moments, adventures and triumphs. The moments that seem so short, the days that are long and all the in-between warm fuzzies, and think to myself, it’s ONLY been a year? How is that so? I cannot recall what life was like before I met you, had you in my arms, snuggling me and kissing me. Watching me, tracking me to make sure I didn’t leave the room. So much time passes in the blink of an eye and you don’t realize it until a milestone like a first birthday comes along. And when that milestone presented itself, you best believe we celebrated in style.

View More: http://nataliareardonphotography.pass.us/donutshoot

Natalia Reardon Photography

Ezra’s First Flamingo Highlights:

  • Pineapple/Watermelon pops
  • Jumbo sized palm leaves
  • Free Printable Pineapple toppers
  • 6 DIY Party Décor Ideas
  • Large Flamingo Balloons
  • Rice Crispie pops
  • Homemade Flamingo Cookies
  • Patio party lights
  • Oreo pineapples
IMG_6927

Olivia Ann Photography

IMG_6966

Olivia Ann Photgraphy

IMG_6989

Olivia Ann Photgraphy

View More: http://nataliareardonphotography.pass.us/donutshoot

Natalia Reardon Photography

View More: http://nataliareardonphotography.pass.us/donutshoot

Natalia Reardon Photography

There was pink, there were feathers, there was sweet corn, pop corn and cake pops. There were pineapples, giant balloons, sunscreen, bouncy castle and lots and lots of laughs. This day couldn’t have gone any better. Yes we were scrambling until the last minute while the birthday girl played with bubbles in her playpen, but man did she have a blast. Leading up to Ezra’s first birthday I thought to myself, yeah for her first birthday I think I’ll do a party, something fun and flashy but not huge. Then it started. Ezra turned 6 months and one of my close girlfriend’s son turned one. Then the other two littles in our group turned one. After months of planning and preparation I was drawn in, sucked in to the ‘first birthday fiasco’ and there was no telling where the end point would be. I had created a vision in my head and nothing would get in my way until the day of completion. This party was going to be big. Real big.

Ezra's First Flamingo

I planned, I prepped, I snipped and snapped, glued and taped. Our home was constantly in a changing form, one day our living room had different shaped ferns covering the couch and floor, the next day we had 4 giant helium flamingos hovering in the corner. Slowly our living space became quite tropical and there was no denying Ez was about to turn one. I was very fortunate to have a couple local shops come alongside me in celebrating with décor. Little Sprout Creations (Ezra’s First Flamingo Banner) and Glitter and Spice (Flamingo Teether).

The only way I got through the couple months leading up to her birthday was three words:

PLAN//PREP//PREVENT

After planning and writing everything down on paper, I went through the stores I would need to go to, compared prices and made a ‘To buy’ list, ‘To do’ list and a ‘To make’ list. Having it all jumbled on to one piece of paper would’ve driven me crazy. Having separated each task into three lists gave me some sanity in picking and choosing what I wanted to do that day and not be overwhelmed with a list 30 items long. I looked through the things I needed to make and chose to start on the most daunting task first. The one that would take me the longest: The ferns. Even though these took the longest, they really made the event and brought all the décor together.

View More: http://nataliareardonphotography.pass.us/donutshoot

Décor:

Here some step by step decor ideas, planning and pictures to help guide you in throwing your very own First Flamingo!

|| Flamingo Balloons:

I was looking online for where I could purchase some of thesewonderful pink breasted birds other than party city and I found them! For CHEAP. I ended up purchasing them from BargainBalloons.com ($4.50 each!). I received them in the mail within 2 weeks and went to go and fill them the day before and NO WHERE would fill them unless they were purchased from their store. I called what felt like every store around but I got word from a friend that a dollar store up the hill would do it!

IMG_6984

|| Pineapple Donut Toppers:

I gathered these adorable little pop on prints from CreativeWife & Joyful Worker. Codi had posted these for a tropical party that she had recently done and used these toppers for donuts with a yellow icing zigzagged on top (SO cute!). If you haven’t had a chance to view her gorgeous set up with Dearlovesblog check it here

I printed these toppers off (large and small sizes) on to card stock, cut them out and then hot glued them on to toothpicks for easy attachment with the treats!IMG_6923

Go to Creative Wife & Joyful Workers Summer Party post for your own Cookie & Donut Pineapple Toppers Free Printable

IMG_6964

|| Banner for Photo booth:

Little Sprout Creations provided a custom made banner for our photo booth, ‘EZRAS FIRST FLAMINGO’ If you are in need of any party décor or custom made banners, seriously, check Jen out @littlesproutcreations. She is the bomb! And such a joy to work with. (If you were wondering, yes she also did our banners for our DONUT GROW UP shoot we did a few weeks ago.

You may also like ‘Donut Grow Up styled shoot’.

IMG_6916

DIY Projects

Below are a few of the DIY projects I took on months before the party and boy am I glad I did! I wouldn’t have gotten them done otherwise.

1. Tissue Tassels (Light pink, white, gold, hot pink)

One of my girlfriends was planning her little ones birthday party a couple months before Ezra’s and was creating these beautiful tasseled garlands. I couldn’t help but jump on board because 1, they were super simple and 2, cost efficient! (and 3, the perfect thing to do while you’re watching survivor)

View More: http://nataliareardonphotography.pass.us/donutshoot

2. Photo booth

This would have been the second photo booth that hubby and I have put together, the first of which being the one we made for our wedding Reception. After doing a bit of research we found it to be quite simple to do and cost effective if you can find your supplies at a thrift store or in the discount bin. For our wedding we had used thin pieces of plywood and thought that it would be better and lighter to use was the wood with holes . Turns out we were wrong, it really curled and bent in the sun and now it is in a heap in our storage room because it couldn’t hold it’s shape. If you get the thin plywood, it is a bit heavier but worth it for either resale or reuse after the initial event!

View More: http://nataliareardonphotography.pass.us/donutshoot

Natalia Reardon Photography

Wallpaper > Value Village : If you know Mackenzie and I, then you know that we are diehard thrifter’s and on a date night, babysitting covered and a couple hours to spare, you can find us at the thrift shops. One of these times we just happened to be wondering through the home décor section and low and behold, tropical palm wallpaper. Obviously when I saw this, I knew that the stars had aligned and we were going to have a photo-booth at Ezra’s birthday. The entire roll (that we still have leftovers) was $7! HELLO!

Other materials we picked up along the way to make our photo booth a success:

Wallpaper Paste (RONA – $12)

Wallpaper tray (RONA – $3)

Plywood (RONA – $12)

3. Photo booth Props

I ended up purchasing the prints online and then printing on to card stock, cutting and gluing to small dowels and it worked lovely! A little bit time consuming but also very cost efficient, I paid a total of $10 for the set and dowels (Dollarama) and everyone had a blast using them!

IMG_6980

Olivia Ann Photography

4. Paper Ferns

These big floppy ferns took me the longest! I bought 8 green poster boards, sketched 4 different kinds and sizes of leaves that I wanted to create, cut them out and retraced each one. This was an evening project that probably took about two weeks. But keep in mind, the only time I really buckled down to do this was when The Voice or HGTV was on.

View More: http://nataliareardonphotography.pass.us/donutshoot

Natalia Reardon Photography

5. ‘One Year of Ez’ Frame (12 x 5×10 monthly milestone photos)

Throughout Ezra’s first year of life, She had this great big golden frame (5ft x 3ft) hanging on the wall in her nursery. This frame was passed down from Mackenzie’s grandmother and is a very special piece of memorabilia for our home. Every month I would go back to it and fill it up with current photos, family and friends in her life and milestone moments. When her birthday came around it only seemed necessary that I fill it with larger versions of her monthly floral milestone photos. Above her present table we hung the frame for all to see, out of reach from littles but perfect height for viewing pleasure!

IMG_7024

6. Floral ‘1’ Decor (Large size)

As some of you reading this may know, I have a few side jobs where I create certain home, birthday and wedding decor. One of which are these beautiful blooming 1’s for first birthdays. (If you or someone you know if interested in these pieces, please send me an email! I create letters, numbers, Canvas Calligraphy and Macrame wall art)

IMG_6915

Olivia Ann Photography

SNACKS

|| Flamingo Cookies

These rockin’ pink feathered beauties were handmade by Ezra’s lovely and very talented Auntie Shannon.

IMG_6996

Olivia Ann Photography

img_6998-e1498110840832.jpgIMG_6965

|| Pineapple Toppers & Watermelon Toppers

I thought that instead of having larger pieces of fruit out for little hands, I would put bite-sized pieces on sticks. They were such a hit! I think they were the snack that I refilled most. (They were a little time consuming, but they looked adorable and I they were easier to hold for tiny hands!)

IMG_6966

Olivia Ann Photography

ONE Snack Table

Donuts: Tim Hortons

Lemonade/Pink Lemonade & Sangria bar – lemonade, sliced lemons and strawberries

Cotton Candy – Safeway

View More: http://nataliareardonphotography.pass.us/donutshoot

IMG_6926

|| Rice Crispie cake pops w/ icing and sprinkles: 

Now this one was a doozy. Something I thought would be so simple and easy, obviously, turned chaotic quite quickly. I cut and stacked the squares and put the straws in the ends (Gold&White swirl straws: Party City) and dipped them into the homemade icing and placed them on the baking sheet. ALL the icing poured off on to the baking sheet, dripped down and pooled on the bottom. I was at a loss trying to think of ideas of what to do to save my beautiful melting creations. I quickly placed the tray in the freezer, then each time I dipped the squares, I sprinkled them and placed them in the freezer. The next day when I brought them out for the party, they were all beautiful iced and sprinkled and if they melted in the sun that was A.O.K. with me. They were beautiful and they were done.

IMG_7025

Olivia Ann Photography

Set Up/ Décor

We started early in the morning, but we all know that even that isn’t enough time! It really IS tricky to set up and really zone in to your project when you’ve got your one year old crawling around and pulling everything you place within arms reach. Luckily I had my amazing in laws and hubby to make this creation come to life! All up to 5 minutes before guests arrived and papa ran out to get ice and beers. Thank you papa.

FLOW: When setting up an event you want to make sure you’re envisioning the day with everyone there, not just empty and pretty looking! When I was looking for a spot to put the photo booth, I needed to put it somewhere where A) no one would constantly be walking in front of, B) somewhere that was inviting, and C) a spot that wasn’t in the blaring sun. In the end of it, I had to opt out and put it in the sun, but it worked and people took pictures! So PHEWF.

The rest of the area fell in to place naturally. In the yard, the bouncy castle would be positioned in the sun in the back corner, the play house in the other corner and the small turtle pool in the shade beside the rocker under the tree. The food/treats table would be set up just beside where the BBQ was, drinks and ice in the stand alone cooler, and condiments/plates/napkins were on the ledge of the BBQ cover. On the deck we had a large umbrella where the comfy seats were and this is where our grandparents and parents would sit. Beside them was a gifts table, if anyone brought a special treat for Ezra I wanted to make sure I had a spot that was for that instead of trying to organize where things went during the party. (On a side note, we chose not to do an ‘opening gifts’ time because there was a large amount people and I feel Ez would’ve been overwhelmed. She was so blessed that day in receiving a mountain of treasures from all who attended! After everyone had left we had her cousins help her with unwrapping.)

View More: http://nataliareardonphotography.pass.us/donutshoot

Natalia Reardon Photography

IMG_7023

That little piano was our gift to Ezra. 6AM is her favourite time to channel her inner Mozart.

View More: http://nataliareardonphotography.pass.us/donutshoot

Natalia Reardon Photography

Touching on the concept of ‘flow’ in the party and proper roll out, I made sure EVERYTHING was prepped. If we needed more napkins/plates/bowls/cups, I had them in a bin under the snack table for easy access. I had any extra food just inside the door for quick refills and I did not bring the cake out until it was time to sing. This ensured the cake wouldn’t melt in the blazing sun or little fingers wouldn’t get to taste test before the big sing along began.

View More: http://nataliareardonphotography.pass.us/donutshoot

Natalia Reardon Photography

Yes, yes. The cake is homemade. Please feel free to boost my baking ego! Because dannnng did that cake have a mad lean and 12 skewers holding it up before it came out!

After the song had been sang, hugs and kisses had been exchanged and well wishes were given, it was time for the GREAT FLAMINGO CLEANUP. Naturally, we plunked all the kids in the turtle tub and carried on our way! I hope you enjoyed Ezra’s First Flamingo as much as we did!! We were blessed beyond compare with the love of family and sunny weather on this day. Now let’s hope this carries on throughout the rest of the summer! No more rain!

Scroll down to enjoy the last few minutes of our big day, take care & see you later lovelies,

XO Cass

View More: http://nataliareardonphotography.pass.us/donutshoot

Natalia Reardon Photography

View More: http://nataliareardonphotography.pass.us/donutshoot

Natalia Reardon Photography

View More: http://nataliareardonphotography.pass.us/donutshoot

Natalia Reardon Photography

IMG_6912

Olivia Ann Photography

IMG_6975

Olivia Ann Photography

IMG_6944

Olivia Ann Photography

View More: http://nataliareardonphotography.pass.us/donutshoot

Natalia Reardon Photography

View More: http://nataliareardonphotography.pass.us/donutshoot

Natalia Reardon Photography