Goodbye Roaring Twenties – Hello Thriving Thirties! – A 30th Birthday Celebration

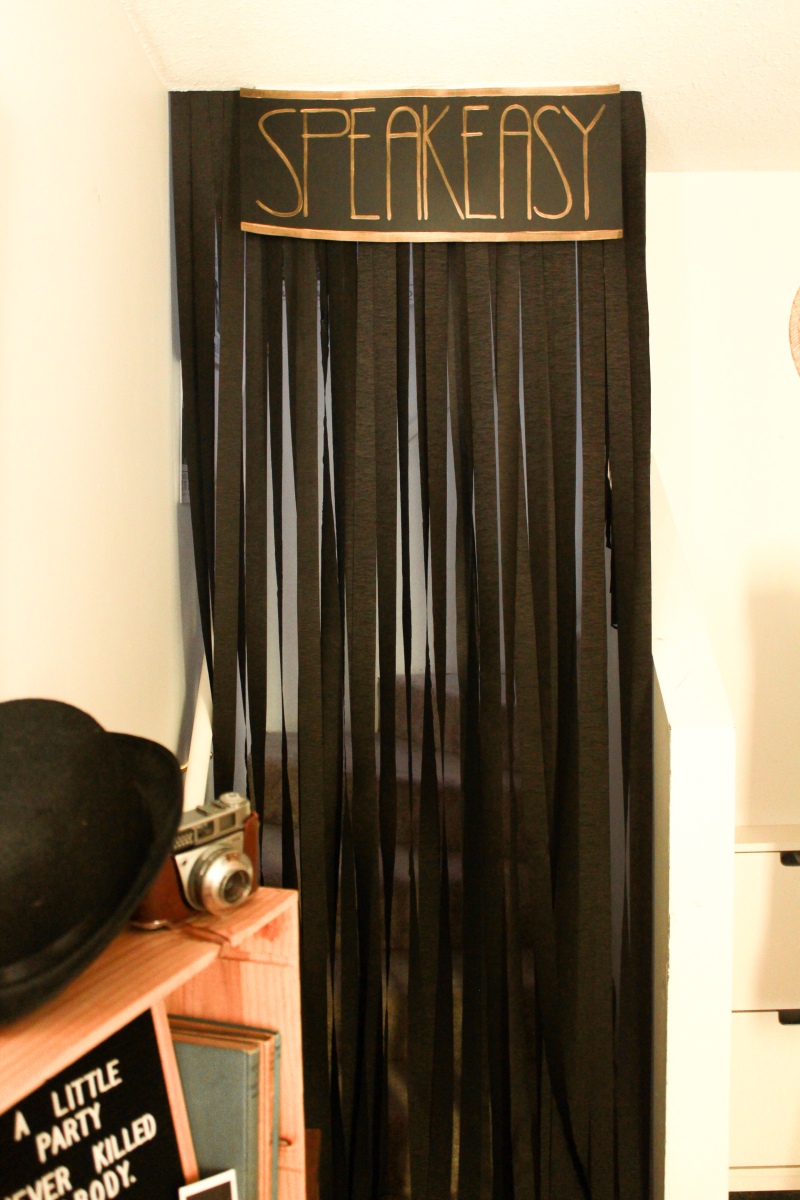
What better way to celebrate entering your thirties, than an ode to all the good times you had in your twenties! Prepare to be emerged into a speakeasy, back alley gambling, cabaret evening! When I was thinking of what I was going to do for Mackenzie’s 30th, I knew it had to be BIG…right? I started researching, pinterest-ing and sketching the vision of this event in my my notebook. Which companies that would fit this theme perfectly and make it all come together seamlessly.

IMG_4888

Make sure you scroll all the way down to see each of these amazing companies, decor ideas for your own twenties themed event, the most delicious desserts and a link to a fun DIY of a fairly easy ‘mugshot’ photo-booth. Below is a full collection of the shoot, styled by me and a true labor of love. I hope you guys enjoy it as much as I did putting it together and seeing it come to life!

34200294_10156238890653211_54218030762164224_nIMG_4851-2IMG_4835-2IMG_4842-2IMG_4826-2

Mirror + Stand : The Jubilee Collection

String Lights – Pretty Things Rentals

1988 Balloons : Party City

Letter Board : Letter Peddler

IMG_4714-2IMG_4722


IMG_4732IMG_4748-2IMG_4815-2IMG_4823-2

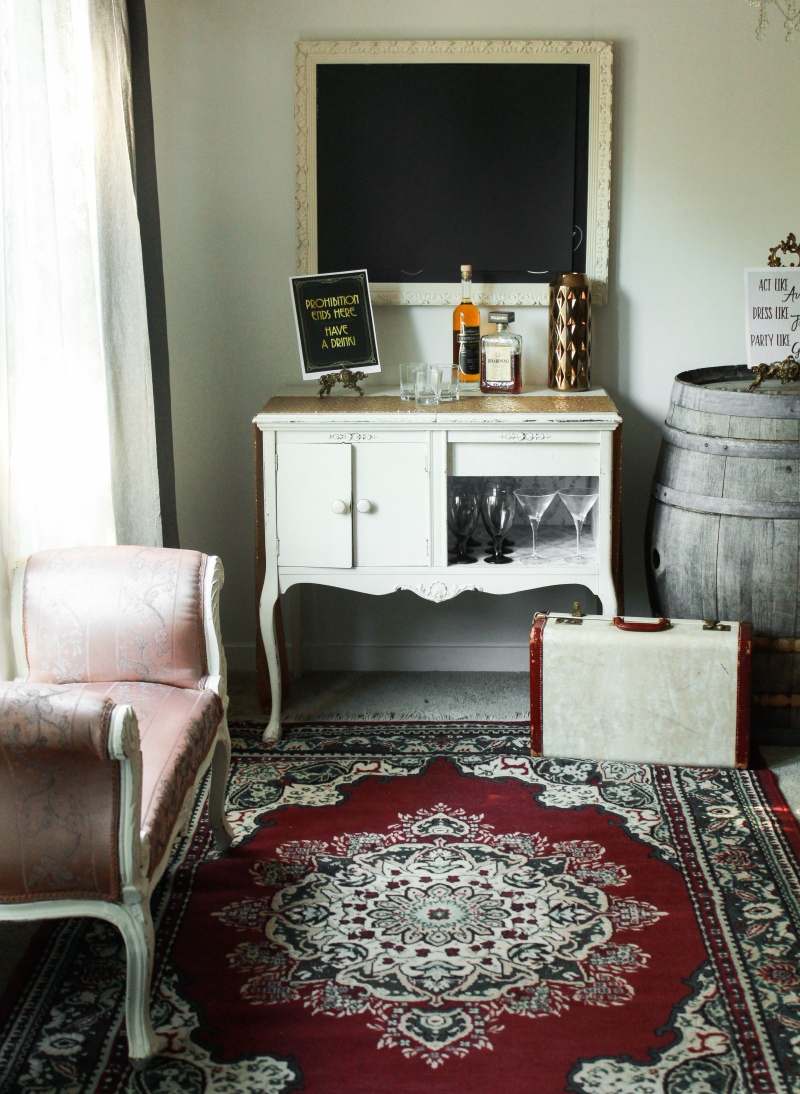
The Decor for this was on point solely because of two unreal boss ladies – Valerie from Pretty Things Rentals and Kayla from The Jubilee Collection, both of which I have worked with before and each time they wow me with their ability to completely capture a vision and run with it alongside you as the creator. Make sure you check out their pages below for more ideas and all the options they have to deck out and glitz up your next special event!

Sequin Runner, Trumpet Vases, Candle Sticks, Goblets – Pretty Things Rentals

Wine Barrels, Sidebar, Chandeliers, Bench, Rugs, Sign Holders – The Jubilee Collection

4 DIY’s For A Speakeasy Themed Party **Coming Soon**

IMG_4757IMG_4758IMG_4727IMG_4706IMG_4699IMG_4692IMG_4691-2

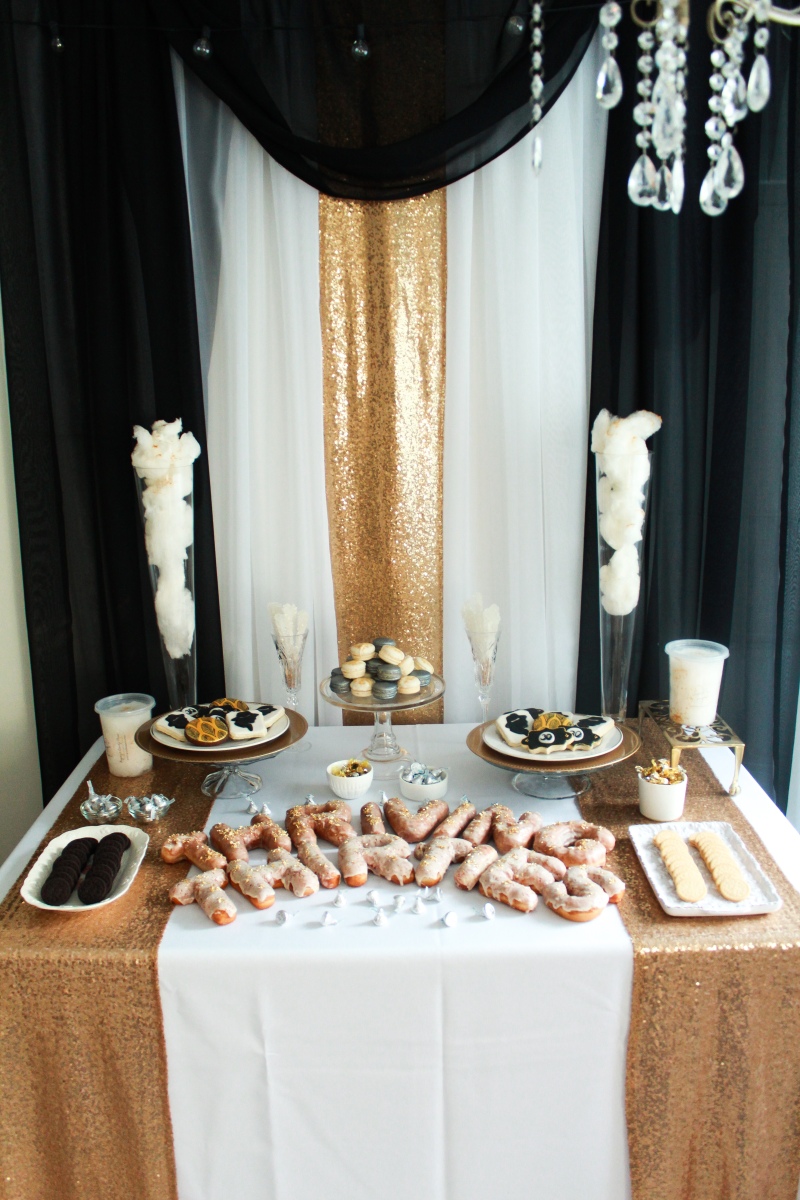
The pastries and sweets that were provide for this shoot were unbelievably tasty, perfectly captured the essence of the event and were way beyond anything I could have ever imagined creating! A HUGE shout out to these amazing (and LOCAL) vendors who were apart of this big day and helped me capture the vision and feel of the 1920’s.

Letter Donuts – Cartems Donuts

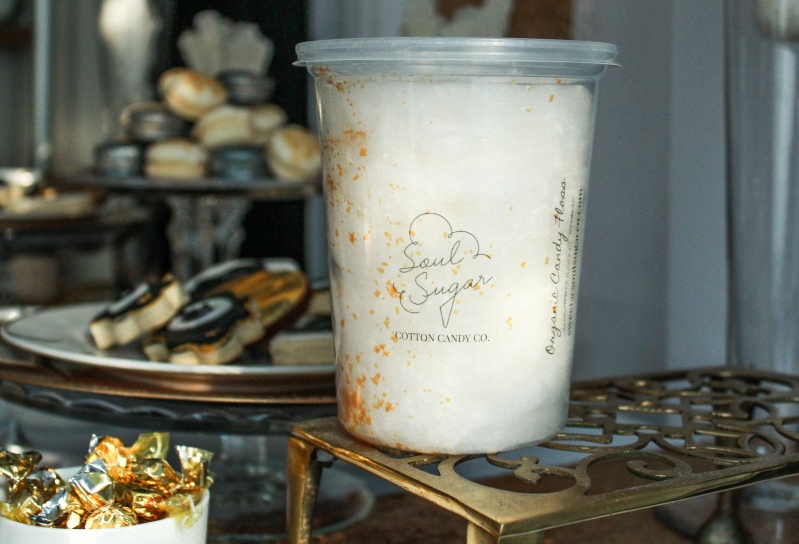
Gold + Silver Candy Floss – Soul Sugar

Gold + Silver Macarons – Kizzy’s Macarons

Gatsby Sugar Cookies – LilleYums Custom Desserts

Bulk Sweets + Cookies – SaveOnFoods

Platters, Draping, Sequin Runners, Flute Vases, Gold Chargers – Pretty Things Rentals

Here are a few more outtakes from later that evening. Some things not pictured was the outdoor poker match we had set up for some ‘backyard gambling’ and some delicious meat and cheese platters from Grimm’s Meats. Enjoy!


Check out some more themed parties I’ve done:

Rainbow Baby Shower

SG Harvest Feast

Donut Grow Up – Cake Smash

40’s Lemonade Shoot


My Little Rainbow – Celebrating a little girl who was Wished For, Hoped For and Prayed For.

This past year was one of the hardest, trying and most broken years I have ever seen someone go through. Last year my sister-in-law went through something no one should ever have to go through, especially more than once. In 2016 Shannon+Derek went through three losses before they were awstruck with the news they’d be expecting their little rainbow on January 28th 2018.

My Little Rainbow Highlights

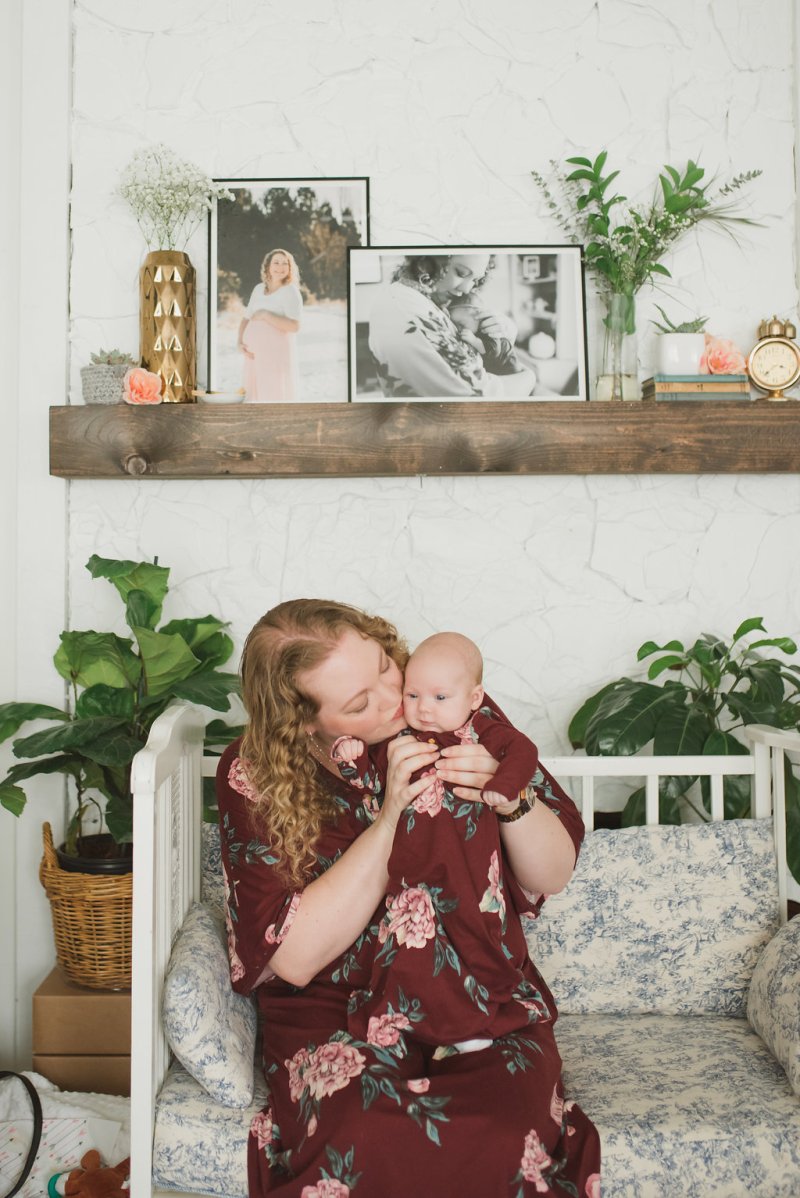
  • A Floral Matching Mommy + Me Set
  • Homemade Chocolate Covered Strawberries
  • Local and Handmade goodies from all over the Fraser Valley
  • Macrame + Floral backdrop
  • Unique Gift Ideas for a Rainbow Baby + Mama
  • Delicious Macarons from Kizzy’s Macarons
  • Sunshine + Cloud Cookies
  • Epic Rainbow Baby Basket (Link Below to come)
  • Happy Little Miss Evelynne

DSC_9224

On May 29, 2017, that little stick showed 2 pink lines; two lines of joy, two lines of hope, but also two lines of fear. Anxiousness of the ‘what if’ and the unknown, only time would tell which path this pregnancy would take. Prayers of strength, trust and health surrounded them as those first months went by. On January 28th 2018 little Miss Evelynne Ruth Winanne Fenton was born, will bright blue eyes and a big loud cry!

This was a baby and MAMA that needed to be celebrated to the greatest extent! The strength that these parents possess has no end and I was so excited to have an afternoon to just love on them and celebrate the ultimate joy that Evelynne is. Thank you to all those who made this happen and come together so beautifully. Please take a look below at the beautiful photos that Megan from Megan Faber Photography took for this special Rainbow Baby Shoot.

DSC_9048DSC_9069DSC_9090DSC_9091DSC_9137DSC_9093-2DSC_9119DSC_9233

Decor

Floral Garland + other greenery – Maple Ridge Florist

Macrame –  Saige + Skye

Baby Script Balloon – Joonie + Joe

‘My Little Rainbow’ Cake Topper + Cloud Garland – Little Sprout Creations

Calligraphy for chalkboard + Window pane – Penscripton6th

Woven Succulent Holders – Twelve Little Things

DSC_8986-2DSC_9008DSC_9051DSC_9011DSC_9171

DSC_9025DSC_9006DSC_9173

Treats + Sweets

Macarons – Kizzy’s Macarons

Pastel Marble Cake – Panda Cakes

Sunshine + Cloud Cookies – Shea’s Sweet Shoppe

Chocolate Dipped Strawberries – Homemade by yours truly!

Alfajores – Jessica Alfajores

Rainbow Baby Cake Topper – Little Sprout Creations

Gold Triangular Party Plates, Cups + Classic Wooden Cutlery – Joonie + Joe

DSC_9152DSC_9154DSC_9210

DSC_9102DSC_9131DSC_9123DSC_9139DSC_9199

Savoury Snacks

Meat + Cheese Platters – Grimm’s Fine Foods

Fruit, Veggie, and Sandwich Platters, Crackers and Beverages – Save On Foods

Sunshine Plates, Cloud Napkins + Wooden Cutlery – Joonie + Joe

DSC_9049

Styling

Stumbling Grace Blog

Photography

Megan Faber Photography

RAINBOW BABY BASKET CLICK HERE

IMG_4364-3


Tofino Touring – BabyMoon for NumberTWO Pt.1

A little more than two years ago, Mackenzie and I packed our bags and camera and headed out on a road trip to Tofino, BC to stay in the Ocean Village Resort. This trip was to be our ‘last hurrah’ to our lives of just the two of us and to welcome the transition of bringing home baby in a few short months. (Here’s a few photos from our trip when I was pregnant with Ezra below!)

Tofino 2018 Highlights

  • Donuts at Rhino Coffeehouse
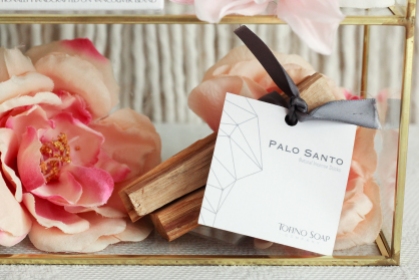
  • Tofino Soap Company
  • Local shopping at SALT Tofino
  • A toddler who can fly a kite better than you
  • Sleeping in beehive cabins
  • Efficient meal planning with Hello Fresh
  • Beachside BBQ
  • Tacos at Tacofino
  • Cheesy grins and wind swept hair

This year we are awaiting the arrival of our second babe, who is due at the end of August, and thought we take a trip down memory lane, pack our bags once more and head off to the BeeHive cabins of Tofino! We mentioned it to the rest of our family, since it was spring break, most would have vacation time, and low and behold, all 16 of us went! We booked up two and a half cabins and four cars, let the convoy begin!

While packing for the trip, we were discussing food, bringing a cooler, transporting leftovers and travelling to Victoria afterwards. We then came up with the most GENIUS plan I think we’ve ever thought up. We were going to bring our Hello Fresh box with us to Tofino! SO good. The box itself comes insulated and could last the trip there, no left overs (depending if Ez eats her whole meal) because it is made to portion, AND so much cheaper than bringing home all the awkward leftovers from grocery shopping that usually get tossed when you get home anyways! One thing I would recommend if you do decide to bring Hello Fresh along on your next trip would be to bring a couple tupperware containers for while you’re there and to call your accommodations to see what cooking utensils they have to make sure you’ll be able to cook what’s in the box!

When we arrived, our first plan of action (always, wherever we go) is to set up Ezra’s sleeping quarters. There is nothing worse when being away with your toddler, who is already out of sorts with the new room, than having to set up their bed when they’re cranky and half asleep. After that, we unpacked and started our first meal from Hello Fresh, put Ezra to bed and then headed over to the grandparents suite to have a games night! Another best part of staying at Ocean Village Resort was that the cabins are about 3 feet apart from each other, which is ideal for large family getaways. The monitor reaches perfectly!

Our second day there, we headed out to Rhino’s Coffee for some donuts, java, and a selfie with the great rhino itself. Of corse Ezra was all in the entire time and was on cloud nine when Wayne, the owner, came out from the counter and brought over an assortment of donuts for us to take back to the cabin and enjoy. Yummy! We then ventured out to stop in at a couple local shops we wanted to revisit and made sure to stop in one of the gems of Tofino, SALT Tofino. One of the goodies we walked away with was some of the beautiful soaps I just couldn’t keep my eyes off of – Tofino Soap Co. you make one heck of a bar of soap! If you are visiting and are looking for THEE place for one stop shop of all the local and handmade artisans, this is it. I even caught a glimpse of some companies that made their way over from Vancouver!

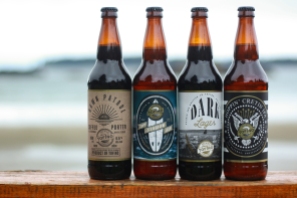
2PM rolled around and we were exhausted, time for a family nap time. Yup. Family nap time – it’s what vacations were made for! We then spent the afternoon down on the beach, which was 20 feet away from our doorstep, although, you could spot Ezra from a mile away with her ‘hazmat’ suite on. Then tucked away for the rest of the night, prepping our second Hello Fresh meal and then geared up for another games night, and we all know a games night in Tofino isn’t complete without pairing it with a few bottles from Tofino Brewing! Family games nights have always been my favourite, I remember when I was 10 or 11 and staying up with my mom and dad until 11pm some nights while we were camping at Golden Ears Park. The best.

Our last day in Tofino, we spent over at  PROVINCIAL PARK BEACH with the whole family. Building sandcastles, exploring tide pools and flying kites. OH the flying of kites. We discovered that Ezra is a pro kite-flyer and should go in to it as a career. I cannot express how funny and ‘in awe’ everyone was that Ezra was so focused on her kite (that was at least 70ft in the air) but would also run around on the beach, squatting in tide pools and digging in the sand. Amongst all of this she NEVER let the kite dip or out of her hand, and if you we’re going to ask her for it she would run as fast as her little feet and HAZMAT suite would let her. (PS – How ADORABLE is this toque from Wild Child Designs – we are obsessed with it and the only sad part about the sun coming out is that she’ll be done with it for this season.)

One special item on the itinerary while we were in Tofino, was family photos. My father-in-law had gone ahead and found an amazing photographer, Karley from Bracey Photography, to capture our entire family, big and small, on the beach. We are SO thankful both to him for scheduling such a precious time and for Karley for capturing everyone so beautifully that morning. (Click HERE to view the full collection – Link to come)

That evening we celebrated our family and the fun we had in Tofino with a good ol’ beachside BBQ with a few bottles of Tofino Brewing by our side. The resort has firepits set up along the beach for families to access during their stay. That evening as we sat there roasting marshmallows and hotdogs, there was a completely different feeling on the beach. A feeling of closeness, family, and just overflowing joy. Each firepit was full of different families, couples and children were walking and running along the tide, and then there it was, the perfect golden sunset.

The entire family stayed for three nights and after we all parted ways, just the three of us headed over to Victoria to enjoy a little more family time. Head over to – BabyMoon Numba TWO – Pt2 to read about the rest of our trip and more family photos!

Have any of your own family trip secrets? Leave a comment below for something new to try out on our next adventure!

XO – Cass


Apple Cider Sippin’ – Recipe

apple cider ingredients

WELCOME! to THE best apple cider you will ever make. I honestly cannot believe how YUMMY this was! I am also not one to declare to the world that something is THE BEST, unless it really is. so here you go!

Now this was the one that intimidated me. When I first set out to put this post together of my favourites for the fall, one staple for me is apple cider, and yes, the powdered ones. This time though, I wanted to try and actually MAKE the cider. So here we are!

You may also enjoy : Homemade Apple Pie – Recipe

I am embarrassed to admit this, but I am quite the snob when it comes to apple and orange juices. I love the raw, pulpy, hand squeezed taste. My absolute favourites are ‘Simply Brand – Apple Juice’ and ‘Tropicana , Some pulp, Orange Juice” LOL! If you love cider as much as I do well then this will be a treat! Here is the full recipe to this delicious Apple Cider, Enjoy!

You may also like : 1-2-3-ROLL your easiest pie crust yet!

Ingredients:

Serves 10-12

• 1 orange

• 1 lemon

• 10 apples (a mixture is good — we used Jazz apples and Granny Smiths)

• 1 Tablespoon ground cinnamon

•  1 small piece ginger, peeled and sliced

• 1 teaspoon all spice

• 12 cloves

• 1 teaspoon vanilla extract

•  3/4 cup brown sugar

You may also like :Homemade Apple Pie – Recipe

Instructions:

1. Peel the zest off the orange and lemon, being careful not to peel off the white pith (as this is very bitter). Cut all of the white pith off and discard, then cut the orange and lemon into slices (don’t worry about the seeds — they’ll be sieved out later).

2. Cut the apples into quarters.

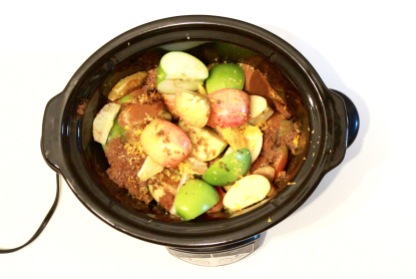
3. Place the orange and lemon slices and peels into the slow-cooker pot along with the apples, cinnamon, ginger, all spice, cloves, vanilla extract and sugar. Pour in enough cold water to cover everything.

4. Turn the slow cooker to high, place the lid on and cook for three hours.

5. After three hours, use a potato masher to mash the fruit into the water, then place the lid back on and cook for a further 30-60 minutes.

6. Strain the liquid through a sieve into a large jug and serve immediately.

7. Alternatively you can cool, cover and refrigerate until needed. Simply reheat in a pan when ready to serve.

Have a recipe you’d like to share? or maybe your very own spin on Apple Cider? I would love to hear about it and add to my recipe book!

XOX

You may also like :The BEST Butter Chicken Sauce

5 Ways to enjoy apples this fall!

IMG_6993

I know, I know, kind of late on getting the ball rolling this fall. Teething, working and a busy-body toddler got first in line for the last couple months! Finally here we are, Apple season is just at the end, but hopefully you will still be able to enjoy some of these festive fall treats and recipes when the colder days roll in!

You may also enjoy 10 Great Gifts for the Mother who does it all!

Apples are one of my favourite fruit, and I know for a fact that it is my husbands favourite fruit, so with that being said, fall always fills our house with these wonderful multi-used fruits! I love the sweeter apples, like Granny Smith, yum! My husband loves the Honey Crisp apples, which are also delicious I must admit, and Ez, well she just loves to have a whole apple in her hand to munch and crunch!

As I started to embark on which pastries and activities I would be putting together for our family this fall, I thought I’d share the love and let you all in on our secret home recipes for a few of our favourites! Enjoy!


APPLE PICKING – TAVES FAMILY FARM

Now to start off apple season, you’ve got to go collect them! This year is super exciting for us because our little miss is walking and almost running, I’ve been waiting for a few months now to go apple picking with her. Just like her dad, she LOVES apples, so going to Taves Family Farm, she was on cloud 9 and could barely contain herself.

She was running up and down the rows of ‘Papple’ trees, picking up all the (gross) apples and trying to take a bite. We had her up on our shoulders, picking the ones at the tippy top and walking alongside the trees, reaching some of her very own. (and then when she would go to pull them off, she would yell at us, “TUCK mama, papple TUCK!”)

Ezra’s outfit : Fox Knit Hat : Home Grown Knot Co. / Cranberry Bow : Little Olive Designs/ Mustard Dress : Jax & Lennon


IMG_5128

APPLE PIE – Homemade is the Best-made

Lets just start this portion of this entry by saying, I am very blessed to have a husband who supports, and eats, everything I do and bake. Lol

The first thing you’ll want to do is make a fresh batch (or two if you’d like to criss cross the top) of some homemade pie crust! Check out the full recipe for 1-2-3-ROLL! Your easiest pie crust yet! for my favourite starter.

The classic homemade Apple Pie. Today I am going to share with you how to make this Holiday Staple. To start, I would suggest definitely picking up some hard, tart apples, Granny Smith or maybe Honey Crisp are great! The best part about this recipe is that there are only 7 steps and you will only need TEN ingredients, and most of these are already sitting on your shelves!

Head on over to [1-2-3-ROLL, your easiest pie crust yet] to find step by step instructions and everything you will need to make this homemade classic!

I wish, I wish, I wish I had a food processor. you’ll see why when you look into the pie crust making above lol! But low and behold I had my trusty pastry blender to bring it all home at the end of the day. One thing to look out for when you are choosing your apples is how juicy they are. Unfortunately when I was making my pie, I overlooked this part and my pie ended up coming out a little more juicy this time. Nothing that a few extra minutes in the over couldn’t help though!

Head on over to Homemade Apple Pie FULL RECIPE to find out what you’ll need to bake your very own Apple Pie. (Make sure you scroll all the way to the bottom for an extra little treat!)


IMG_7150

PB & Apples : A classic and a staple in this household!

Honestly, one of my go-to snacks from since I can remember, is just cut up apple and peanut butter. Here’s a picture? But I’m sure you know what it looks like lol!

You may also enjoy : The Best Butter Chicken Sauce


IMG_4577

Apple Cider

I cannot believe how YUMMY this was! Now this was the one that intimidated me. When I first set out to put this post together of my favourites for the fall, one staple for me is apple cider, and yes, the powdered ones. This time though, I wanted to try and actually MAKE the cider. So here we are!

I cannot believe how delicious this cider was. I am embarrased to admit this, but I am quite the snob when it comes to apple and orange juices. I love the raw, pulpy, hand squeezed taste. My absolute favourites are ‘Simply Brand – Apple Juice’ and ‘Tropicana , Some pulp, Orange Juice” LOL! If you love cider as much as I do well then this will be a treat! Here you can find the full recipe to Apple Cider Sippin, Enjoy!

IMG_4414


I ended up storing mine in one of our growlers we had and it worked out so well!

You may also like : Canadiana Styled Shoot


IMG_7142

Apple Chips

When I was growing up, my parents had an awesome food dehydrator (now being an adult and mother myself, I am extremely envious of this and wish I had one!). When I was thinking of making my own apple chips for my daughter, I was kind of bummed because I didn’t think I would be able to make them without a machine. I then stumbled across a couple recipes that only called for a pan, knife, apples and 200 degrees for 3 hours.

HELLO simple and HELLO delicious! I was quite hesitant and unsure that these little slices would turn out, but low and behold, 3 hours passed and there they were, delicious, crispy and full of crunch!

I am still in awe of how easy and delicious these were! Highly recommend these delicious chips. The only part that was a bit daunting was slicing the apples, but if you’ve got a super sharp knife, or better yet, a mandolin then you’ll be fine!

Here’s what you’ll need:

  • 3 apples (larger size and either granny smith or honey crisp)
  • sharp knife
  • 2 baking sheets
  • parchment paper

IMG_7080

Start by slicing your apples into very thin slices and placing on the baking sheet. The parchment paper will make it easier to flip your apples when you are halfway through baking. I overlapped my apples and it turned out okay, so don’t be afraid to get more on your baking sheet.

Preheat your oven to 200 degrees. When the oven is ready, place your baking sheet in for 1 hour, remove and flip apples to other side and cook again for 1-1.5 hours. I found that mine were still a bit ‘soggy’ when I took them out after 2 hours so I kept them in and checked every 15 minutes to make sure they weren’t burning. 3 hours was perfect for my oven!

ENJOY!


During this whole process there was a few times that I had to put Ez in her high chair and try and make do with what we had around the house, some of this included using the wooden spoons I was baking with to whack her tray with, paw patrol, eating an entire apple and the saviour of them all, a wagon wheel. This kid will pick off every last bit of the CHOCOLATE and then eat the marsh mellow! Who’s kid is this?!?! 

After the first few items on this list, not that this is some grand realization, but I can confirm that apples are amazing. You can pick them, bake them, juice them, jar them, dry them and the list goes on.

Tried any of these recipes out? I would LOVE to see how you did and your spin on these Holiday Classics! Please tag me on your instagram @stumbling grace, Stumbling Grace Blog on facebook or sending me a message on here! Good luck and have fun ❤

XOX Cass


Homemade Apple Pie – Recipe

The classic homemade Apple Pie. Today I am going to share with you how to make this Holiday Staple. Start off by picking up some hard, tart apples, Granny Smith or maybe Honey Crisp are great! The best part about this recipe is that there are only 7 steps and you will only need TEN ingredients, and most of these are already sitting on your shelves!

You may also enjoy : The Best Butter Chicken

Ingredients:

  • 2 batches of my one minute homemade pie crust (or 1 if you roll it out very thinly!)
  • 7-8 small granny smith apples, peeled, sliced, and cored
  • 1 stick butter
  • 3 tbsp all-purpose flour
  • 1/4 cup water
  • 1/2 cup white sugar
  • 1/2 cup brown sugar
  • 1 heaping tsp cinnamon
  • 1/4 tsp nutmeg
  • 1 tsp vanilla

1). Place the peeled, cored, and sliced apples in a large bowl. Set aside.

2). Preheat oven to 425F.

3). In a medium saucepan, melt butter over medium heat. Add the 3 tbsp of flour and mix well, forming a paste. Add the water, sugars, cinnamon, nutmeg, and vanilla and mix well. Bring to a boil for 1 minute, then reduce heat to a simmer for an additional minute.

4). Remove from heat and reserve about 1/3 cup of filling for pie crust. Add remaining filling to apples. Toss well.

5). Pour apples into prepared pie crust, mounding slightly. Top with second pie crust (lattice design, etc). Brush the remaining 1/3 cup caramel filling over the crust.

You may also enjoy : Keepin’ comfy no matter what hat I’m wearing

6). Cover the pie loosely with aluminum foil. I lightly spray the foil so it does not stick to the pie. Place the pie on top of a cookie sheet (to catch any drips) and bake at 425F for 10-12 minutes. Reduce the heat to 350F and bake for another 50 minutes (remove the foil the last 10 minutes to let the crust brown), or until done.  The pie is done when the crust is golden-brown and the apples are soft when pierced with a fork.

7). Allow the pie to cool before serving. Enjoy!

Serves: 8-10 people.

Recipe adapted from: http://allrecipes.com/Recipe/Apple-Pie-by-Grandma-Ople/. 

Adapted recipe courtesy of Audrey’s Apron.

Mini Pie Bites (or deceiving sausage rolls)

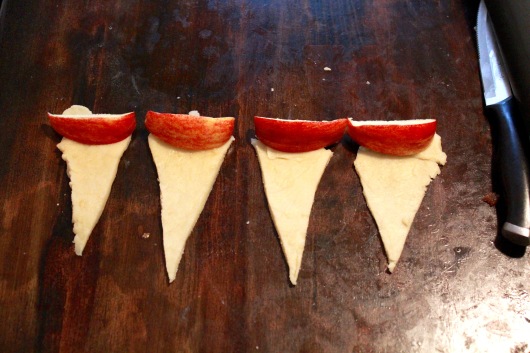
After I had put the filling in to the pie crust and noticed that I had some left overs of the filling and the dough. I quickly cut up another apple and made little triangles of dough to wrap with filling for small like apple bites. It was a complete on the whim experiment but it worked out! I put them on a small pan beside the pie and let them cook about the same time as the pie – checking on them every 20 minutes or so though!

Enjoy!!

I would LOVE to hear your favorite fall time recipes and if you have ever experimented with your very own apple pies! or better yet, created apple bites yourself lol!

XOX Cass


1-2-3 – Roll! Your easiest pie crust yet!

Homemade Pie Crust? WHO has time for that?! Why you do of corse. With this simple recipe, you’ll be making this pie crust in your sleep, especially after you bite in to it! When I first started thinking about making my first pie a few years back I assumed I would just pick up a ready made pie crust from the grocery store. Nope. Apparently I married in to a connoisseur of all things baked/cooked from scratch.

You may also enjoy : Top ten gifts for the mom who does it all

To get started here, always remember to wash your hands and take off your rings! Does any one else have a small trinket dish that they use when baking/washing hands/doing chores that they use to keep their treasures? Below you will see my place of choice. It is called the ‘Trinket Dish” from Three Corners Artisan.

Trinket Dish - Three Corners Artisan

You can find the Trinket Dish HERE.

Having a husband who avidly searches to cook new things is definitely not a problem for me! My husband is constantly showing and teaching me new ways to cook things, how to tell if something is done (or overdone, whoops!) and that sometimes it really is easier to just make it from scratch! Hence, this simple 3 step pie crust recipe. Don’t be intimidated! If I can do this, you can do this!

You may also enjoy : The Best Butter Chicken Sauce

4 Step Homemade Pie Crust

Ingredients:

  • 1-3/4 cup all-purpose flour
  • 1 teaspoon sugar
  • 1-1/2 sticks butter (12 tablespoons), cut into slices
  • 1/4 cup + 2 tbsp ice water

1) Mix flour and sugar in bowl.

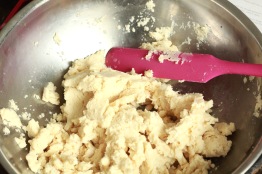
2) Add about half of the butter.  Add the rest of the butter. Blend until the mixture turns into coarse crumbs (small pea size).

3) Slowly add the ice water and pulse until the dough gathers up into a ball.  If it doesn’t after a few seconds, add a few more drops of ice water until it does.

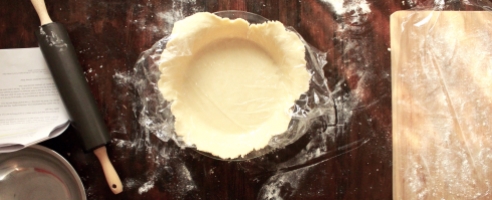
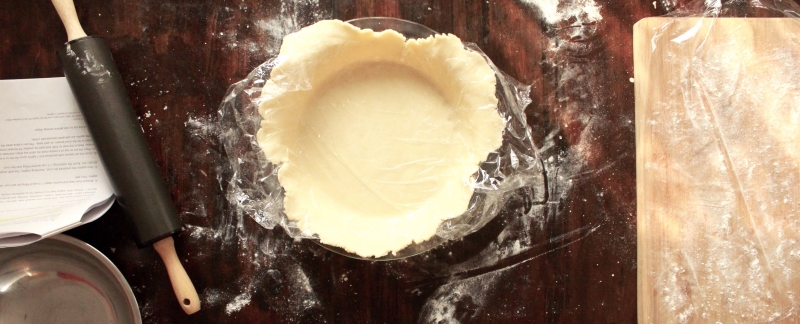
4) Take the dough and flatten it into a disc and place it on a sheet of floured plastic wrap. Refrigerate for about 30 minutes before rolling. Remember to use the plastic wrap trick from below!

If you’ve got any tricks up your sleeves on how to make pie crust, different designs or just want to share your experience with this recipe, let me know below in the comments! I would love to hear from you, and get new ideas! 

Happy Baking!

XOX – Cass

(Check out my 3 extra tips below to easier pie dough making!)

Pie Crust 101

3 Tips to the easiest pie crust!

Tip #1 : One thing that I did see online, that I did not have but would love to try one day, is someone suggested using a food processor to mix and blend the butter into your flour mixture. I took the rustic path of the pastry blender. 

You may also like : Canadiana Styled Shoot

Tip #2 : When rolling out the dough to get it ready for the pan, place a piece of saran wrap overtop and underneath of the dough before pressing the rolling pin down. This will make your life, and washing time, so much easier! The dough will not stick to the rolling pin and will be a nice quick wrap up and toss when done.

Tip #3 : Once you have refrigerated and rolled out your pie crust, you can decide how you would like to form it. I always love the classic look of pinched edges and a lattice crust, but you can be creative! Remember, rustic is okay here: you want your pie to look homemade!


Berry Pickin’ & Finger Lickin’

This past weekend we were intrigued to follow the crowd and head on over to the bounty and beauty of Krause Berry Farms. We started off the morning by gathering for brunch at Jen’s (@littlesproutcreations), which then turned into a small gathering; where there is food they will follow. With a delicious spread of fruit, oatmeal, bacon, eggs, pancakes and so much more, I’ll have to give Jen an A+ for hosting brunch!

After filling up on all the goodies, we started the ever-so-daunting hustle to get out the door and forty-five minutes later, we were on our way. Accompanied by Jen and her family we buckled down and braved the farm!

Kenz and ezbabybear designUPICK instructionsblue emiblue emi 2

When we arrived at Krause, there was a HUGE lineup for the annual butterfly release. This is a time where you can purchase a butterfly (to release) for $25 and proceeds go towards the Langley Hospice Society. 500+ guests call ahead of time to reserve their butterfly and release theirs in a time frame of 15 minutes, in to the farm and the garden area.

We stopped and wandered for a little bit to gaze at all the beautiful ‘Painted Lady’s’ and then headed for the Raspberry fields! We were told that the strawberries were completely over picked the prior weekend and that they were closed. But no worries here, Ezra, and Emi, would take raspberries over strawb’s any day!

row of plantseveryone in one shotsmiling pulling wagon

You may also like ‘Beach Ready from Head to Tote’

leaning overkenz and ez waterpickin berries me

Going through the countless rows of Raspberries, we were constantly watching the girls to make sure they were hydrated, shaded, and not eating all the berries. The tall Raspberry bushes made it easy to tuck the wagon to the side in the shade for a couple berries and some water.

jen and kids in wagonjen crouched with kidscass and ez berrie pickinez and basketcass picking beside wagon

E2 loved running up and down the rows of berries, well, really it was Emi running and Ez watching. We picked berries for about an hour and then headed in to walk through the market. I think our total for the berries we picked was close to $2.50. We didn’t bring home as much as I would’ve liked to but next year we’ll have to go a couple weeks prior and bring home a flat!

Emi basketEmi and JenEmi eating berriescass pickingbackpack shot

We could tell that the girls were getting tired and a little toasty from the sun, and given Ezra’s episode a few weeks back (see post here), we decided to head out, We made our way to Little Donkey in Fort Langley for some burritos! Ez has a fascination with beans and everybody loves burritos, and Jarritos, so this was the perfect fit! (That, and Trading Post was busy).

Ez and KenzEmi SassEmi2Emi close up Mocs

All in all this day of brunching, travelling, berry picking and Little Donkey’s was great and there needs to be more days like this. Next on the list is Blueberries in August!

Emi Jen and Alex

Emi’s Wearing

Floral Romper : Grammies Girls

Footwear: Flamingo – Minimoc

Ezra’s Wearing

Floral Romper: Little & Lively

Footwear: River – Minimoc

Teether : Baby Bear Designs

Mackenzie’s Hat : Nine O’clock Gun


Donut Grow Up – Donut Smash!


When people started to ask me if I would be doing a cake smash for Ezra’s birthday I thought, ‘uhm obviously.’ Like they even had to ask. Then I started to think about different ways or themes I could do for it, what really screamed EZRA and what would she enjoy? (other than Paw Patrol). I then remembered another theme I had wanted for her birthday party but was unable to do, because, well, Flamingos.

View More: http://nataliareardonphotography.pass.us/donutshoot

View More: http://nataliareardonphotography.pass.us/donutshoot

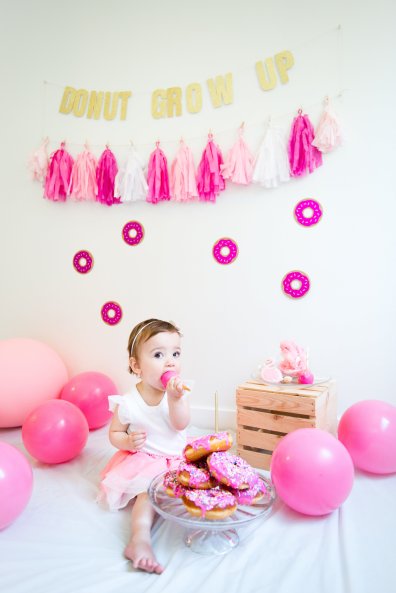
My second choice for her birthday theme was ‘Donut Grow up’. Super cute, playful and full of hot pink messiness! The adventure began. I started to jot down ideas, placement and who I would love to be involved in this shoot and came across four mompreneurs who joined in celebrating Ez turning one.

  • Glitter&Spice
  • LittleSproutCreations
  • Natalia Reardon Photography
  • Always and Foreverly

View More: http://nataliareardonphotography.pass.us/donutshoot

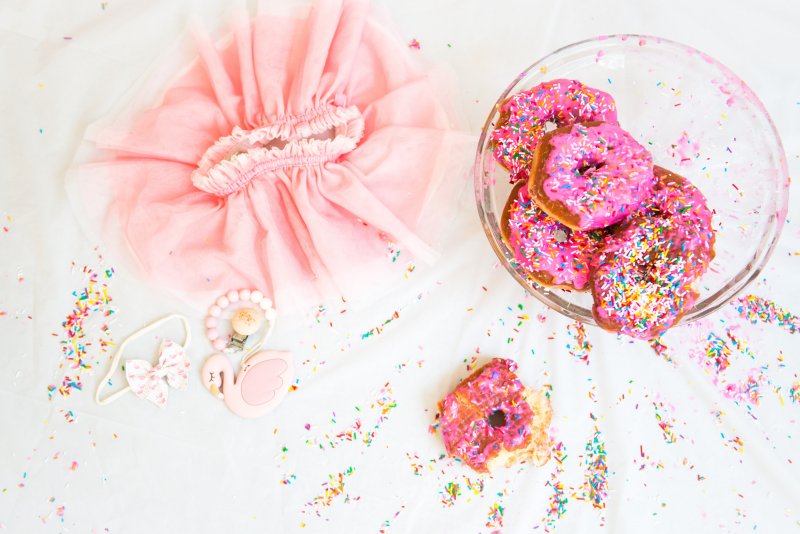
Then came the donuts. YUM. I picked up some plain glazed donuts from Safeway and made my own hot pink royal icing. Yah, you could probably already guess, it didn’t really go as planned. My sister came over to help prep for the shoot and we made do with what we had and they were sloppy and oozing on the sides with color and sprinkles. Homer Simpson would’ve been proud.

Here comes the fun part.

Enter Ezra.

View More: http://nataliareardonphotography.pass.us/donutshoot

View More: http://nataliareardonphotography.pass.us/donutshoot

View More: http://nataliareardonphotography.pass.us/donutshoot


View More: http://nataliareardonphotography.pass.us/donutshoot

View More: http://nataliareardonphotography.pass.us/donutshoot


Obviously, any parent anywhere knows that you dress your child in white when you WANT them to get messy. So here she is, poofy sleeves and pink tutu, ready for 6 stacked, hot pink donuts.


Most people I have talked to about their cake smash said their little one wouldn’t even touch the thing. That they had to put their hands in it and get messy, then, almost like being given the go ahead, they dive in!


Throughout the shoot Ez kept going back to the cake pops and was a huge teething fan of the sticks that were attached. We kept turning them around so she could have some cake, but she would take one bite and then off we go again, bottoms up.


View More: http://nataliareardonphotography.pass.us/donutshoot

I am so lucky to have Natalia Reardon Photography partnering with me on this journey of blogging and styled shoots. We had a blast with this shoot and we’ve got some pretty rad things coming your way this summer! Keep your eyes peeled!

View More: http://nataliareardonphotography.pass.us/donutshoot

Can you spot some details that may be giving you a sneak-peek of the theme of Ezra’s birthday party?

(Hint: Think feathered&pink)

View More: http://nataliareardonphotography.pass.us/donutshoot

     View More: http://nataliareardonphotography.pass.us/donutshootView More: http://nataliareardonphotography.pass.us/donutshoot

LET’S COLLABORATE! >> If you are looking to put together a styled shoot, head on over to my contact page and send me a note! I (and Ezra) would love to chat and be apart of your next creative adventure!

View More: http://nataliareardonphotography.pass.us/donutshoot

Donut Grow Up Banner – Little Sprout Creations

Tutu – Cousin Hand-me-down

Hot Pink Donut Wall Decor – Little Sprout Creations

Pink/Gold/White Bunting – DIY

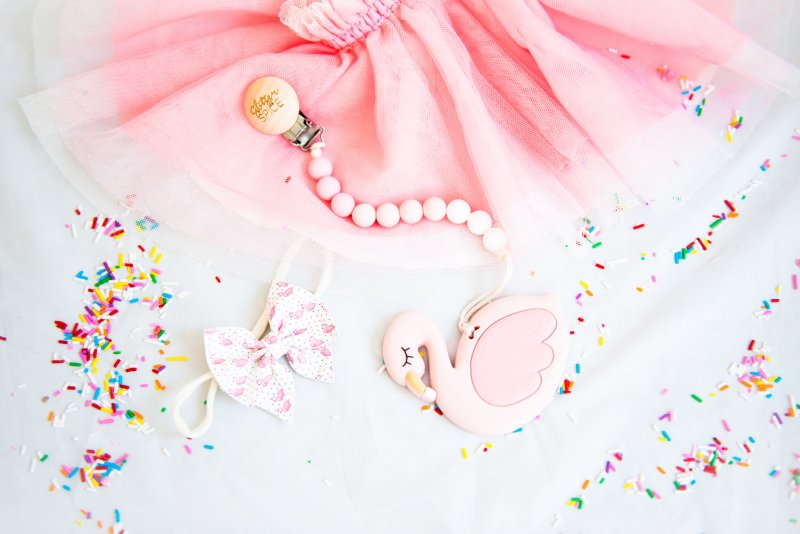
Flamingo Teether – Glitter and Spice

Photographer – Natalia Reardon Photography

Donuts: Safeway & DIY

Flamingo Bow – Always and Foreverly

Breastfed to Finger fed – easing the transition to solid foods

Breastfed to Finger fed – transitioning to solid foods and supporting your child in this whole new world of taste buds!

     I am so eager to get this post out that I write to you from the car! My husband is driving us to our second-in-laws for a BBQ and some pool time. This post has been on my mind for about six months now and I’ve finally buckled down and put in the ground work to bring it to you, so I hope you get lots out of it!

     Over the past few weeks we’ve been discovering new recipes and recreating old ones to adapt to Ezra’s little taste buds. (Nothing too high class – ex: Ez loves bananas, so when we discovered she wasn’t allergic to PB, we made her PB & banana sandwiches!)  The transition from breastfed to finger fed hasn’t been a struggle and Ez LOVES food, but she does have her moments where we just need to revisit a few foods after her first encounter. Example: banana at 6 months; not a fan. Banana at 8 months; has eaten it everyday since.

     Friends and family have both shared with me that babies take up to 5 times to actually like something. If you are trying to transition your babe to solids or even just purees, keep trying, it may just be the texture or even the sweetness/tartness. This is one thing that I’ve kept in mind when trying out new and different tastes/textures with Ez. At first when we started to give Ezra solids, we started with banana and rice cereal (I know, not so much a solid as it is a puree). As I wrote above, she was not a fan of banana and frankly, I was terrified to give her anything that wasn’t smooth sailin’ like water or milk.

     Slowly we moved forward in the solids department and have now made our way to fully finger-fed, no more boobie for baby. I’ve gathered up some of our tried & true favourites, both in my opinion and Ezra’s. Most of these are easy to make and can be put together with the ingredients you already have!

weee

Let’s get started!


1. Raspberry, Coconut & Rolled Oats (NO BAKE)

     Don’t worry my dears, these delicious looking treats come with a recipe and take less than 15 minutes to muster up! All you need are four ingredients, but make sure to keep these puppies refrigerated or in the freezer until you want to eat them!

IMG_9667

Raspberry, Coconut & Oat Balls (&& a little flour)

Ingredients:

1Cup Rolled OatsRaspberry Coconut Balls

1/2Cup Flour (add more as needed if they’re too moist!)

1/3Cup Unsweetened Shredded Coconut

1/2Cup defrosted and crushed frozen raspberries

Directions: Add all ingredients into bowl, mix with spoon or hands & roll into loonie sized balls, place on baking sheet or plate to store in fridge/freezer.

That’s it! You’re done!

2. PB & Banana rice cakes

     One of Ez’s, and many babies, favourite foods is banana. It’s easy to hold on to, you can chop it up or slice it down the middle. squishy, but holds shape, that is, if it’s not too ripe! I usually just buy the plain rice cakes, don’t really need to add any extra taste to these delicious snacks. (Sometimes when I am at restaurants I sneak a couple PB’s into my diaper bag – the perfect extra little protein on the go! shhhhh!)

Banana PB rice cake_Fotor


3. Gnocchi

     These little guys have a texture of somewhere in-between a banana and a noodle. Perfect sizing for the fist of a little one who’s just started discovering how to eat! Prep time? Boil the water, throw them in the pot, 2 minutes later, take em’ out and serve. Super simple and your little one will love being able to have independence in feeding themselves one teeny bite of potato at a time. (If you’re not making them from scratch, I am not this ambitious, I would suggest the Oliveri brand. I bought mine at Save on Foods in the deli section)

IMG_5736


4. Fruit, Fruit, & More Fruit!

     My little bean just loves fruit. Any kind and all the time. I have been giving her everything under the sun and she just makes it disappear! Some fun ones to cut in to sticks/slices are the ones pictures below. Grapefruit not so much a stick but the pieces are small and squishy, kind of makes them work for the sweetness of the fruit! Just make sure you are checking your fruits for seeds/rinds.

Fruits

5. PIZZA – the remix.

     As much fun as pizza is to give to a toddler, I find the dough to be a bit too much for them and they more than often dont get enough of the good stuff on the top! I opted out for doing a ham and cheese pizza for Ez with flat bread and some left overs in my fridge. I took some left over pasta sauce, deli ham and shredded cheese from a pizza soup hubby had made earlier in the week (YUM! – check that out here, super yummy!). I prepared the oven at 350, put my toppings on and placed the flat breaded pizza straight on to the rack, let cook for 10 minutes and then sit for 5 minutes on the counter to let it cool. I made it a little bit easier for Ez to eat by cutting the pizza into strips so she could hold on to it and munch away.

IMG_5742pizza two

6. EGG – just egg.

     Holy guacamole does this little girl love egg! Scrambled, hard boiled, fried, she’ll take it all. My most recent and creative way to give her egg is on an individual cast iron skillet. This is GENIOUS. We went out for sushi a couple months ago and we had ordered a huge variation and assortment of dishes. One of which showed up and was a huge hunk of egg on rice. I wasn’t about to eat it but I knew someone who may just love it; lil’ Ez. It took her awhile but after about 20 minutes, the egg and rice underneath was gone. So when I found a cast iron skillet to re create the style and texture of egg, you know I was on board right away. And so was she!

     For the eggs on the skillet, I usually will scramble two in a small bowl with a fork and then pour hem in the skillet. Wait a couple minutes until the top of the egg starts to firm. I then place the whole skillet into the over at 350 degrees for about 5 minutes. This ensures the egg is cooked fully, but also the perfect texture to cut in to strips for easy finger feeding!

eggs

       I would also like to add here that if you’re having a tough time getting your little to try eggs, let alone even like them, one of my girlfriend’s, Sam, mashes banana and egg together to create pancakes. You may also find you can use sweet potato as well and her little one just eats it up!!

7. Pizza Pretzel. That is it. One love baby.

Pizza Pretzel_Fotor

8. Pancakes & Berries

     Last weekend I had the utmost pleasure of helping host a bridal shower for my beautiful friend Dianne. She makes my heart sing, she is such a beautiful soul, so naturally when she asked for a PANCAKES&PANTIES BRIDAL SHOWER (how stinkin’ cute is that? This will definitely be up on the blog) I couldn’t say no. Naturally, after the day had passed, there was some mini pancakes left over. Hmm I wonder who would love these mini pancakes? EZ. Finger fed, hand held, teeny tiny pancakes. This little miss was on cloud nine that morning! I put the pancakes on her tray with an assortment of berries, she loved it!

IMG_0478

9. Steamed Veggies

     Part of your little ones teething experience and being introduced to solids is the sensation of teeth taring through their gums. Not a very nice feeling AMIRIGHT? Hot and cold foods help with soothing this sensation. Brocolli and carrots have been a go to for these past few weeks. Here are my the two time frames I find work best for self-fed babies. Leaving the vegetables firm enough that they dont squish right in to their fingers as soon as they pick them up! (&& maybe a little bit of cheese is delicious too!)

Broccoli – Boil 4min

Carrots – Boil 7 min

steamed veggies

Adorable Mountain Dinner Plate by Timber Child

10. Leftovers

     What better meal prep than leftovers? Not only are you keeping your sanity, but baby is fed and enjoy their cold macaroni, pasta or even tuna helper! I just noticed all of those are pastas… Baby loves pasta! Ez also loves to eat whole tiny pickles, here’s a photo below of an average snack time at our house hold!

BONUS Extras:

Some of the ones I haven’t posted above are:

  • Grilled Cheese (cut in to slices)
  • Dill Pickles
  • Veggieballs – IKEA (seriously!)
  • Tomato pasta
  • Cheese stick

Let me know what you’ve found easiest/hardest in your own adventure going through the transition of breastfed to finger fed. I would love to hear your own ideas and answer any questions you may have for me!

Take care && Happy feeding!

xox Cass