
Whether it be at another friends house, Sunday School or at IKEA itself, every time Ezra sees a little kitchen she is mesmerized and hooked. There’s no prying her away without a fight. For her second birthday this year, she was gifted the IKEA Duktig Play Kitchen from her grandma and papa. My husband and I had seen ways to DIY this teeny little kitchen all over Pinterest and are always looking for what our next project will be around the house, so naturally we got to work! We left it in the packaging for a few days until we could decide which style we wanted to go with and how we would go about it. We collected a few extra items to complete the project and got started Friday night and by Saturday evening, she had her own little dream kitchen that she woke up to Sunday morning!
The whole process wasn’t as tricky or time consuming as I thought it would be, there are TONS of different ways to personalize your own little kitchen; wall paper, accessories, handles, paint colour, etc. Below is a photo of the before and after of the kitchen and a step by step (with links) of how you can achieve the same look, or even tweak a few steps to customize it to your child’s likes!


Tools
- Hammer
- Finishing Nails x 8
- Large Level (2ft approx. for easier tracing but can also use ruler)
- Pencil
- Painters Tape
- Sharpie (fine tip)
- Scissors / Exacto knife
Additional Materials
- Rust-Oleum All Surface Metallic Pure Gold Spray Paint+Primer : Gold Spray Paint
- Krylon ColorMaster Paint + Primer Flat White : White Matte Spray Paint
- ORRNÄS Handles from IKEA (2 Packs)
- Self Adhesive Vinyl in ‘OAK’ from RONA (1 Pack)
- FINTORP hooks (5 pack) from IKEA


 You may also like : Tea for TWO – 2nd Birthday Tea Party

Step by Step
1.Spray Painting
PREP : Make sure you FILL all the holes on all the kitchen pieces and hardware with painters tape before spraying. (We found this out the hard way with a past project and have never made the mistake again!)
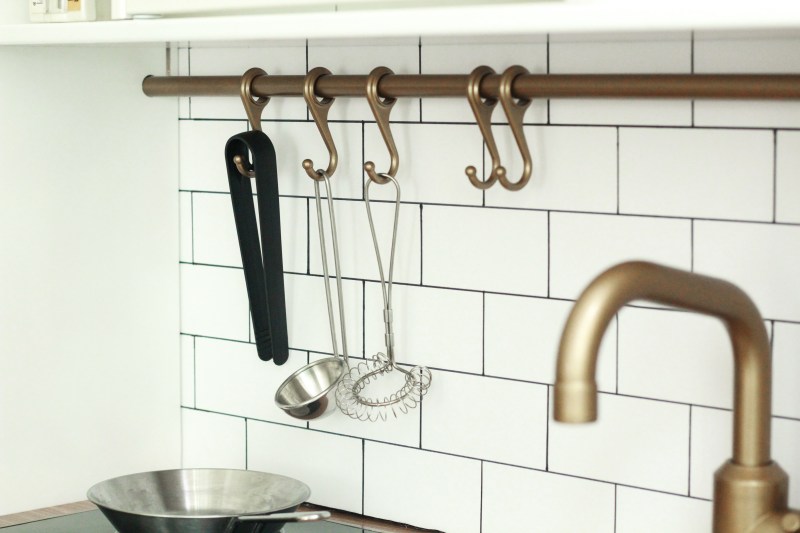
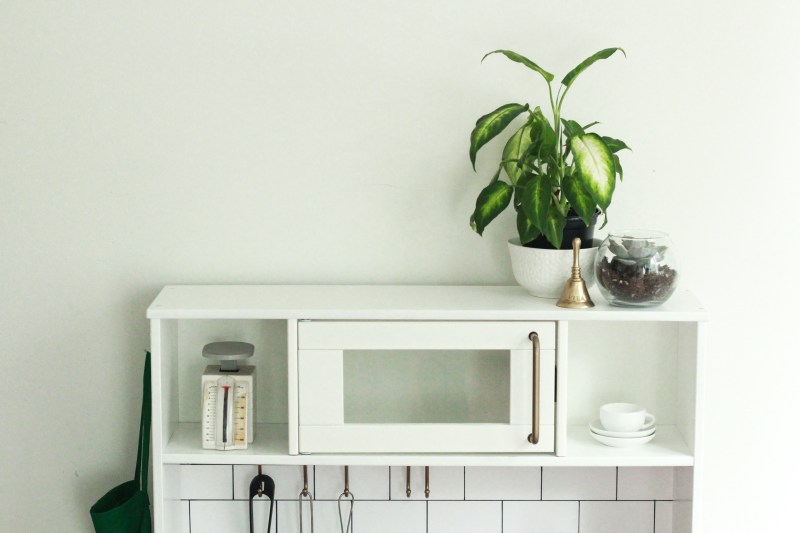
We hung the little kitchen hooks on a tight string to spray paint them. Most of the gold only needed one coat, whereas the cabinets and backing needed 2 coats.
2.Measuring + Tracing Kitchen Tile
I started planning out the tiles by spacing the lines on the side with a ruler and little mark and then later drew the longer lines across. The size I used for the tiles was 2×4 inches and I did 7 rows. Luckily we have a larger level and I was able to just use that to level and trace each line for the backsplash. I did however add an extra row of tiles and extended the line about an inch or two to ensure that it covered the entire space, just in case you need to adjust the position of the backing.
3.Apply Self-Adhesive Laminate to Countertop
I would suggest having someone help with this step, the adhesive itself is somewhat readjustable incase you do place it in the wrong spot, but better safe than sorry! I measured out the countertop before applying, but made sure there was a substantial amount to curve over the sides. We then removed all of the backing, I placed the adhesive down on the far right corners and started to press down. As we went, I would also press out any air bubbles with my debit card. After all the adhesive was down and the bubbles were out, I then flipped the counter top over and cut two diagonal lines to fold in the left over pieces that were covering the hole for the sink and stove top. Lastly, the edges of the countertop itself, we did the same thing with cutting in diagonally to the corners of the adhesive that was hanging over and criss crossed the edges to get that curved look and folded the rest underneath the counter top. (This part required some extra finesse, but looked so nice when it was done!)
4.Follow IKEA directions to assemble all your hard work!

 You may also like : LEGO of your DIY fears
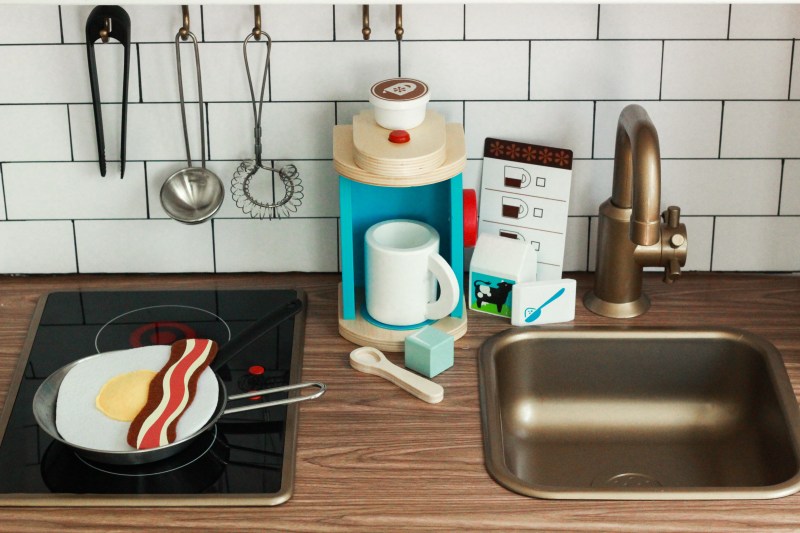


Some things we added to make it extra special for Ezra:
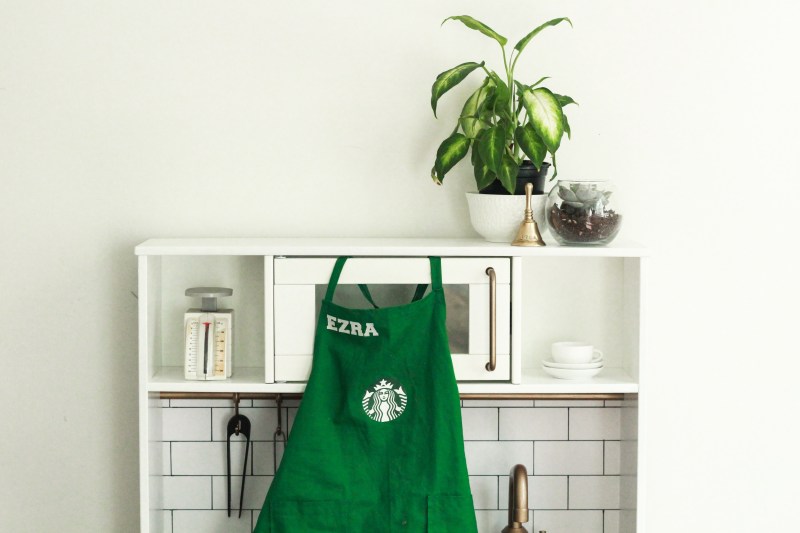
- Command Hook on the side for an apron she received from a coworker for her birthday. It was handmade and Ezra was on cloud nine the moment she laid eyes on it, “MOMMY’s-work?! Ezra-me?!”
-
Felt Food Sandwich Set – Melissa and Doug, you can find this pretty much anywhere online or at a lot of local kids stores. A BONUS for this, is that it also comes with bacon and eggs, perfect for the stove top!
-
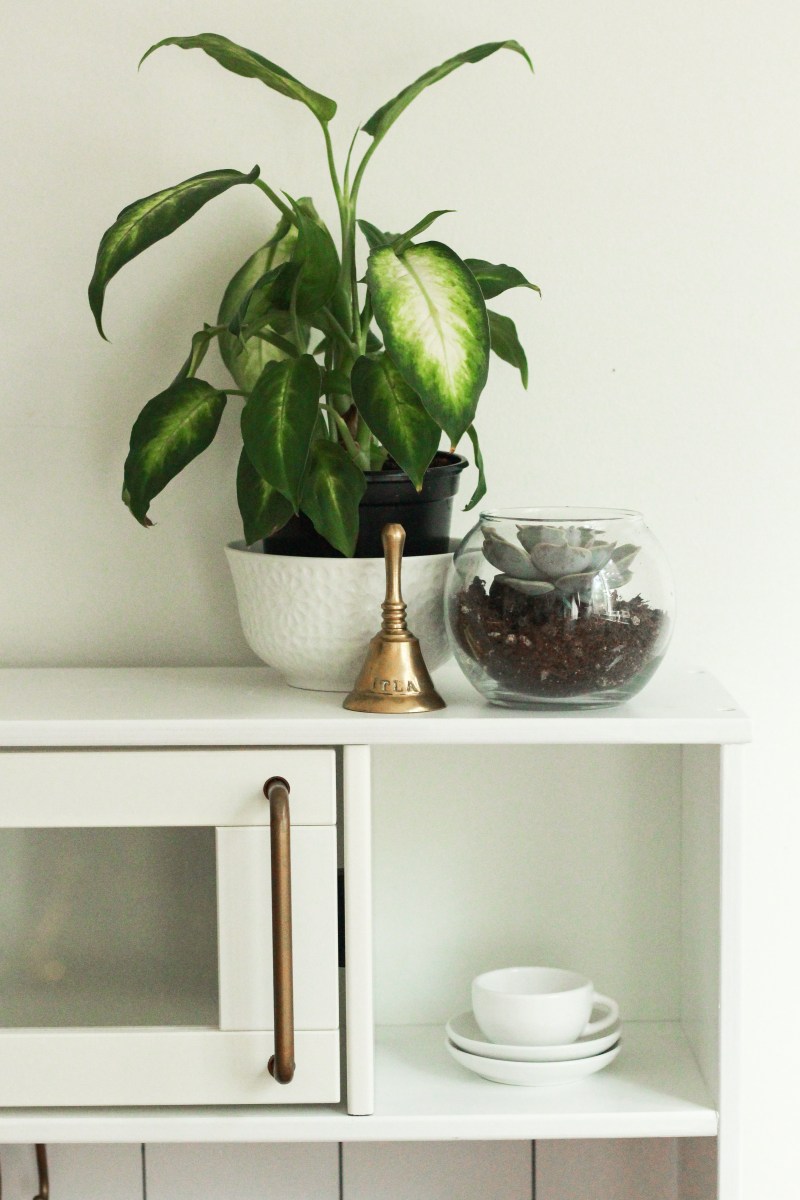
Vintage Tea Set we scooped up from a local thrift shop and ‘Tea Time’ bell from my grandpa’s bell collection!
- Wooden Brew + Serve Coffee Set – Melissa and Doug– Ezra received this as a gift from her aunty and makes us coffee every morning while we make the real stuff!
- Sushi Slicing Play Set – Melissa and Doug – Her eyes lit up when we opened this up. We always go out for sushi together and now she had her very own! The pieces also stick together and can cut it apart – so fun! What can I say, we love our M+D toys!
- IKEA Pots + Pans / Baking Set / Cooking Utensils / Play Food
I always love creating, wether it be for myself, a loved one or something like a play kitchen! If you are planning on giving your play kitchen a little extra love, I would love to see what you do or did! Leave me a comment and a photo below or if you’ve got any extra questions about the process!
XO – Cass
