SG Holiday Gift Guide | 2017

One of my favourite things to do is talk about things I am passionate about. Activities I love, dreams I hold dear and products and shops I believe in and am proud to support. I’m sure I am not the only one who boasts about something when they try a new shampoo and their hair is the most radiant and full it’s ever been or find an oversized bib that has extendable straps to grow with them – UHM. HELLO! You gotta share the love and spread the word!

Here is a list of some of tried&true favourites and a couple new! I hope you find something you’ll enjoy as well, or spark ideas for a loved one!

XO – Cass

_________________________

HIM

IMG_9072

Men’s Gift Box – B Natural Skincare


starbucks-tumbler

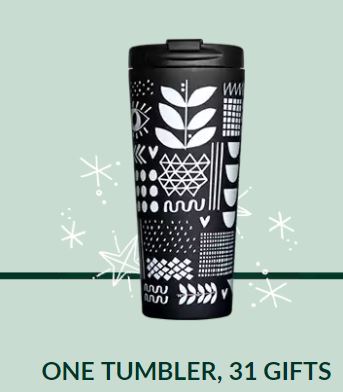
FREE Coffee&Tea Refill Tumbler – Starbucks


Growler Carrier – Perpetual Motion Creative Works


Whitecaps Tickets – Whitecaps FC


IMG_8948-2

Bottle Opener – Brand + Iron


Craft Beer – Mariner | Four Winds | Parkside | Yellow Dog | Twin Sails | Moody Ales

You may also like Father’s Day Gift Guide

_________________________

HER

Bath Soak+Bath Bombs+Sitz Bath – So Luxury


 Customized Gold Bar Necklace – Mint+Birch


Hair Repair Kit – Nezza Naturals


Calendar – V SHOP


Soy Candles – Luxurious Bath + Relaxation


Trinket Dish & Golden Indigo Ornament – Three Corners Artisan


Glass Jewellery – Sweet Caroline Creative

You may also like ‘Top Ten Gifts For The Mom Who Does It All’

_________________________

LITTLES

Doll Carrier – Beluga Baby


fullsizeoutput_160e9

Clip Message Clipboard – A Little Love Creative


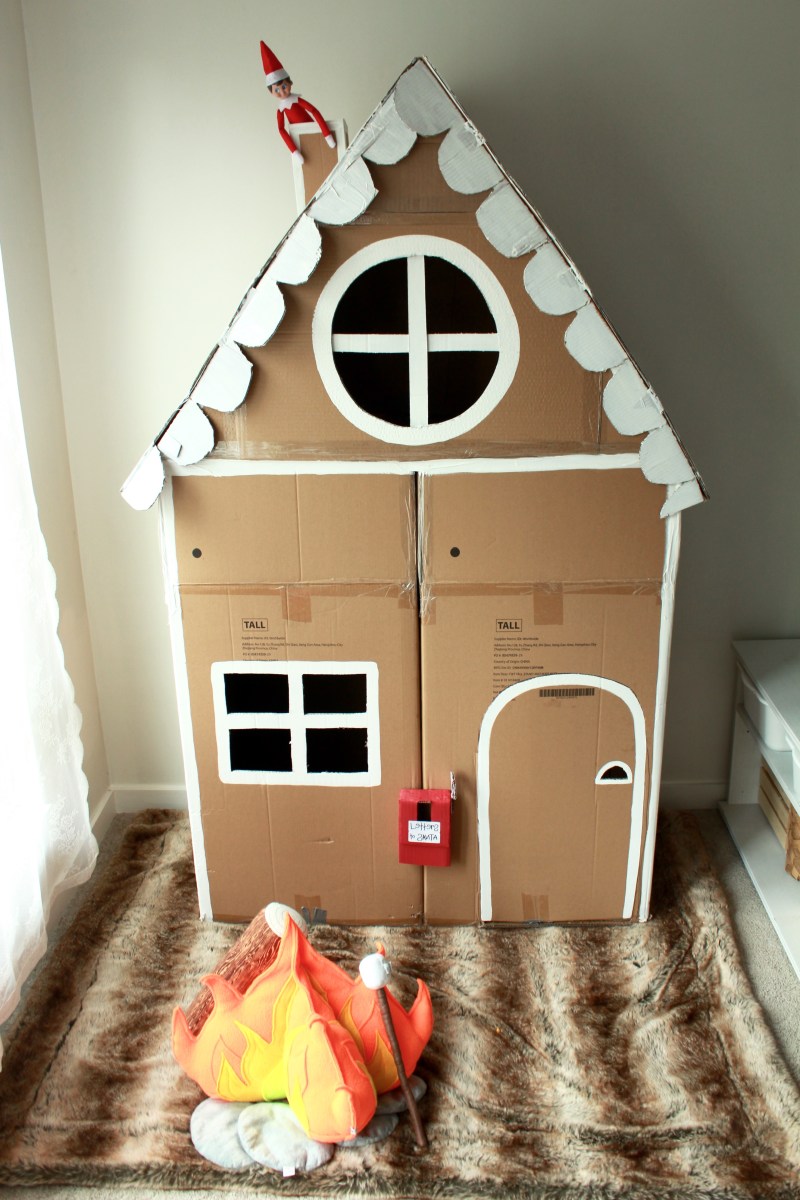
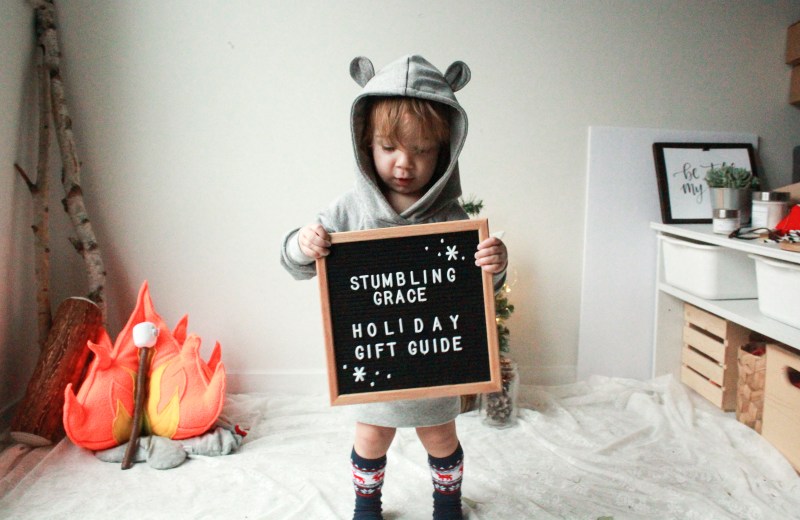
Fire Pit Play Set + Teddy Bear Pullover – Nixi Lauroo


Personalized Backpack/Diaper Bag Tag – Ava to Zoe


IMG_8846

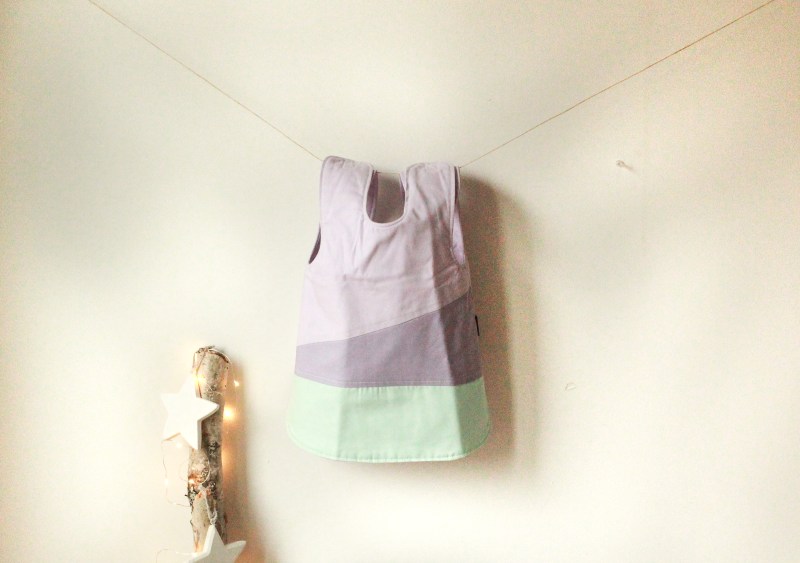
Vinklar Apron Bib – SKÅGFÄ


Crochet Holders (Pencil/Collections/Etc) – 12 Little Things

You may also like ‘Mat Leave Ends, Another Adventure Begins’

_________________________

FAMILY

37f4707121252e6296f0863c91d1dc0e

DIY Adventure Jar – A jar to store away extra funds for a day out with the family!


Tube-Park

Sledding/Tubing – Cypress Mountain


Family Photos – Olivia Ann Photography |Kaptured by KayCait Kennedy Photography |  Alyssa Kellert Photography+Film (check out our family film here)


Letter Board – Letter Peddler


Hemlock Himmeli Air Plant – Aloe Yucca


Stamped Hot CoaCoa Spoons – And Then Again


IMG_9004-2

Handmade Wall Decor – Rusticly Reclaimed Signs

You may also enjoy Berry Pickin’ Finger Lickin’

IMG_9402

Hopefully you were able to find something for everyone on your list this holiday and if you’ve got your own favourites I should add to my list this year, leave me a note! I would love to hear your own recommendations and holiday cheer!

Take Care!

x0x Cass

6 Foot Gingerbread House (cardboard; not cookie)

One thing that I really do miss about my life before I had Ez, was working as a preschool teacher. Being able to create different play spaces for the children each month and theme related to what they would be learning about. Now that Ez is a little bit older and I am able to play with her more and more, running around the house, peek-a-boo and imaginary play!

How excited was I when the huge rollout for Starbucks’ Holiday merch came in and there was 2 GIANT boxes and endless others. I couldn’t help but take them home, already having the dream of one day making Ez a giant box fort. Then the holiday season rolled around, it completely embraced me and here we are!

Ezra’s Gingerbread House

Materials

  • 2 Extra large boxes / 2 medium / 2 small
  • Exacto Knife
  • Duct Tape
  • Clear Tape
  • Red / White Acrylic Paint
  • Paintbrush

STEP 1 : B O X E S

The first thing you want to do is find two large boxes, about the size of a mini fridge or an ottoman, for your base. You can use smaller boxes and attach them together, but in my opinion, if a toddler is running through it, you need some sort of stability! THINK B I G. I taped them together at the top to get ready for the next step! TIP : I got my boxes from Starbucks, you could also go to furniture stores, that way you know the boxes are clean and dry! 

You may also like LEGO of your DIY fears

Step 2 : T R A C E  I T  O U T

The second step is to trace out how you want your house to look. Pinterest, google, search out different ideas for what you want to create. I chose to do two windows, different shapes, a chimney and a door. TIP: When I was sketching out the shapes for the roof and window, I did it from the opposite side that would show on the outside, so it didn’t matter how many times I re-drew. TIP #2 : Find an item in your house to trace some of the more finer pieces. i.e. large whicker basket for the roof window. 

Step 3 : M A K E  T H E  C U T

After you have all of your pieces ready and sketched, it’s time to cut them out. I found that it was really hard to cut across and so simple to cut top to bottom because of the grooves in the board itself. But at the end of the day, the only one judging will be your child, and there will only be screams of joy! Remember to make the chimney and the mailbox. TIP : I cut all of the pieces out and cut the window slots afterwards, it was too awkward to try and cut little squares out of a large piece of board!  

CHIMNEY : When you are making the chimney, it’s tricky to get the right angle so I suggest cutting it out how you think but make it EXTRA LONG so then when you need to adjust and trim, you have space to.

You may also like : Canadiana Styled Shoot

SCALLOPED EDGING : I made this separately after I had completed the base of the house, I had some extra pieces. It was really on a whim, just remember, bigger is better, more playful and play-like!

Step 4 : R E I N F O R C E

You’ve cut all the edges and pieces, now to reinforce any extra pieces that may need to stay folded or bent a certain way. I used TONS of duct tape here and clear tape for the outside. TIP : I used other pieces of cardboard to make those long straight lines to make sure they would be equal

Step 5 : P U T  I T  T O G E T H E R

When I was putting it all together, I actually had to reinforce a couple pieces with an extra piece of cardboard on the inside of the roof. I used only duct tape on the inside for extra support and clear on the outside. TIP : Save the roof until last, you will want to paint it first and separately. Already being attached to the house is too awkward!

Step 6 : P A I N T

Paint the roof first, you can do lines, scallops or even bricks if you like! This is also the time that I painted the chimney and entire scalloped trim so that it would be dry by the time I was done the house. Paint the edges of the home, doorway, window frame and any other additions on the house. When I painted the chimney, I painted all the edges and then let it dry and sized after. Don’t forget about your little mailbox!

Step 7 : E N J O Y

Fill your gingerbread house with teddy’s, plush blankets and everything cozy! One thing that really brought this Gingerbread House home (even though I don’t think I’ve ever added one on a cookie house) was this amazing fire play set from Nixilauroo. (The marshmallow has a MAGNET in it to attach to the stick!! – MIND-BLOWN) Head on over to their site and check out the HUGE variety of play sets they have, colours and even prints! And if you’re still perusing through after the fire sets, search for their brand new teddy bear hoodie. You won’t be able to resist! I know I couldn’t!

IMG_8347

Take care and enjoy playing in your gingerbread houses! Please tag me on insta @stumblinggrace and let me see YOUR creations you’ve made for your littles. I would love to see your creativity and have some inspiration from you!


XO Cassandra